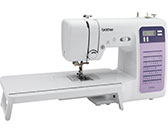
FS70WTx
ЧЗВ и отстраняване на неизправности |

FS70WTx
Дата: 27/08/2020 Идентификационен номер: faqh00101510_003
Outline of viewing the LCD Screen
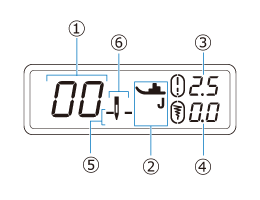
When the machine is turned on, the LCD will light up and the following screen is displayed.

| No. | Item Name | Explanation | |||||||||||||||
| (1) | Stitch number | Shows the number of the currently selected stitch pattern. | |||||||||||||||
| (2) | Presser foot |
Shows the symbol for the presser foot to be used. Before sewing, attach one of the presser feet shown here.
* The symbols for certain presser feet, such as zipper foot "I" and the quilting foot, may not appear in the screen. |
|||||||||||||||
| (3) | Stitch length |
Shows the stitch length of the currently selected stitch pattern.
When |
|||||||||||||||
| (4) | Stitch width |
Shows the stitch width of the currently selected stitch pattern.
When |
|||||||||||||||
| (5) | Needle stop position |
Shows whether the needle stop position is set to the lowered position or the raised position.
|
|||||||||||||||
| (6) | Needle mode (single needle / twin needle) |
Ако ви е необходимо допълнително съдействие, моля, свържете се с центъра за клиенти на Brother:
Обратна връзка за съдържанието
Имайте предвид, че този формуляр се използва само за обратна връзка.