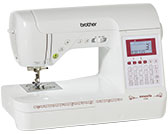
Innov-is F400
Nejčastější dotazy a pokyny pro odstraňování potíží |
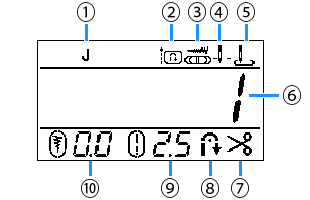
Outline of viewing the LCD Screen
When the power is turned on, the LCD comes on, and the following screen is displayed.
The screen is changed using the keys below the LCD.

| No. | Display | Item Name | Explanation | |||||||||||
| (1) | Presser foot |
Shows presser foot to be used. Before sewing, install the presser foot indicated here.
* The symbols for certain presser feet, such as zipper foot "I" and the quilting foot, may not appear in the screen. |
||||||||||||
| (2) | Reinforcement priority | Shows that reinforcement priority has been set to " |
||||||||||||
| (3) | Width control |
Shows that the stitch width can be adjusted using the sewing speed controller. |
||||||||||||
| (4) | Needle position setting |
Shows single or twin needle mode setting, and the needle stop position.
|
||||||||||||
| (5) | Initial needle position |
Shows either "1 Straight stitch (Left)" or "3 Straight stitch (Middle)" as the utility stitch that is automatically selected when the machine is turned on.
|
||||||||||||
| (6) | - | Stitch number | Shows the number of the currently selected stitch pattern. | |||||||||||
| (7) | Automatic thread cutting | Shows automatic cutting for both the upper and the bobbin threads after sewing. | ||||||||||||
| (8) | Automatic reverse/reinforcement stitching | Shows automatic reverse or reinforcement stitching after a stitch pattern is sewn. | ||||||||||||
| (9) | Stitch length |
Shows the stitch length of the currently selected stitch pattern.
When |
||||||||||||
| (10) | Stitch width |
Shows the stitch width of the currently selected stitch pattern.
When |
