PR-620/620C/600II/600IIC
FAQ & Fehlerbehebung |
How do I install the bobbin wound with thread
- The machine does not indicate how much bobbin thread is remaining. Before starting to embroider make sure that there is enough bobbin thread for the pattern.
- Make sure to clean the bobbin case every time the bobbin is changed. For details on cleaning the bobbin case, refer to "Cleaning the bobbin case".
1. Removing the bobbin case
-
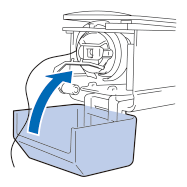
Open the hook cover.
Pull the hook cover toward you.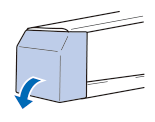
-
Pull the thread picker toward you.
To gain access to the bobbin case easily, pull the thread picker toward front.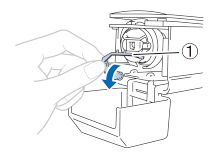
(1) Thread Picker
Thread picker is a device that is used to hold the thread when beginning to sew or when trimming the thread.
The thread picker can only be moved within a certain range. Do not pull it with extreme force.
-
Grab the bobbin case latch, and remove the bobbin case.
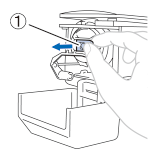
(1) Latch
-
Oiling the machine
After removing the bobbin case, apply oil to the machine.
The race should be oiled. For details on oiling the machine, refer to "Oiling the machine".Put a drop of oil onto the hook once a day before use.
2. Installing the bobbin
-
Insert the bobbin into the bobbin case.
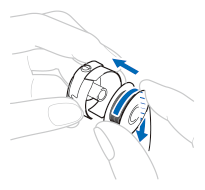
Check that the thread winds off the bobbin clockwise as shown in the illustration. If the bobbin is installed with the thread winding off in the opposite direction, the embroidery will not be sewn correctly.
-
Pass the thread through the thread slit and under the tension-adjusting spring.
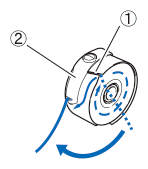
(1) Thread slit
(2) Tension-adjusting spring
-
Pull the thread about 50 mm (2 inches) through the opening in the tension-adjusting spring.
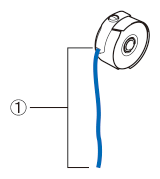
(1) About 50 mm (2 inches)
3. Installing the bobbin case
-
Insert the bobbin case into the hook.
Insert the bobbin case while aligning the tab on the bobbin case with the notch in the hook, as shown in the illustration.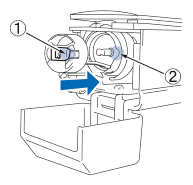
(1) Tab
(2) Notch
-
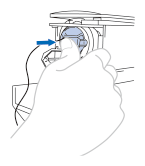
Fully insert the bobbin case until it snaps into place.
-
Close the hook cover.
