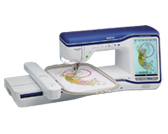
Innov-is XV8500D
常見問題&故障排除 |
How to specify the Guideline Marker Position With the Sensor Pen
The guideline marker is a laser; therefore, do not stare at the laser light directly. Otherwise it may cause blindness.
The sewing position will be indicated by a red guideline marker.
The position of the guideline marker can be adjusted to your desired location.
-
Turn on the machine.
-
Display the sewing screen.
-
Select a stitch pattern.
-
Press
 (Sensor function key).
The sensor functions screen appears.
-
Press
 (Guideline marker position setting key).
The guideline marker position setting screen appears and the guideline marker flashes.
-
With the sensor pen, touch the location to be specified as the guideline marker position.
- The machine's guideline marker moves to the touched position and flashes.
- The distance from the left reference line to the touched position appears in the guideline marker position setting screen.
- The stitch preview on the upper left side of the screen is updated according to the specified setting.
Press "Cancel" to stop specifying a setting with the sensor pen.The following error message appears if the area outside of the sensor pen touch range is touched.
Press "OK", and then touch within the sensor pen touch range.
- The position can be precisely adjusted by touching the adjustment areas with the sensor pen.
-
When using the sensor pen to specify the guideline marker position, it may not be possible to exactly specify the desired location. In this case, use either of the following operations to make fine adjustments.
- Touch an adjustment area with the sensor pen to adjust the position in 0.5 mm increments.
- Adjust the position with the guideline marker scale shown in the next step.
-
Press "OK" to apply the guideline marker position setting.
The setting can also be applied by a long touch of the sensor pen within the adjustment area.
- The stitch selection screen appears again, and the setting in the guideline marker scale changes to the setting specified with the sensor pen.
- The guideline marker stops flashing.
If you set the needle drop position, the stitch width or stitch position after specifying the guideline marker position, the guideline marker may move while setting. The guideline marker moves back to the specified position after the needle drop position, stitch width or stitch position is set and the original screen appears.