HL-4040CN
คำถามที่พบบ่อย และการแก้ปัญหาเบื้องต้น |
Replace the toner cartridge
The Brother machine has separate consumables the toner cartridge and the drum unit. Verify you replace only the toner cartridge and not the drum unit.
> Click here to see information for the difference between the toner cartridge and the drum unit.
> For the order number (Order No.) of the toner cartridge, click here to see the Consumables & Options page.
Follow the steps below to replace the toner cartridge:
NOTE: Illustrations shown below are from a representative product and may differ from your Brother machine.
DO NOT use flammable substances or any type of spray to clean the inside or outside of the machine.

-
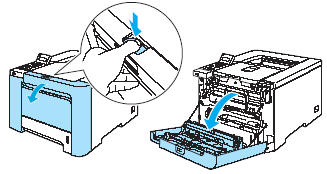
Turn off the printer power switch. Press the front cover release button and then open the front cover.
-
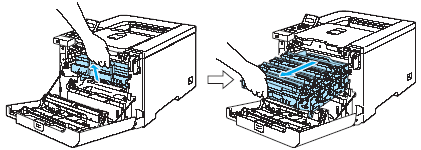
Hold the green handle of the drum unit. Lift the drum unit up and then pull it out until it stops.
-
Hold the handle of the toner cartridge and pull it out of the drum unit. Repeat this for all the toner cartridges.
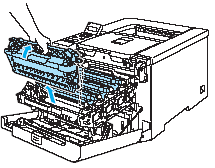
- We recommend that you place the toner cartridges on a clean, flat surface with a piece of disposable paper underneath it in case you accidentally spill or scatter toner.
- DO NOT put a toner cartridge into a fire. It could explode, resulting in injuries.
- Handle the toner cartridge carefully. If toner scatters on your hands or clothes, wipe or wash it off with cold water at once.
- To avoid print quality issues, DO NOT touch the shaded parts shown in the illustrations.

- Be sure to seal up the toner cartridge tightly in a suitable bag so that toner powder does not spill out of the cartridge.
- Discard the used toner cartridge according to local regulations, keeping it separate from domestic waste. If you have questions, call your local waste disposal office.
-
Clean the corona wire as follows:
-
Push to release the latches of the white corona wire cover (1), and then open the cover.
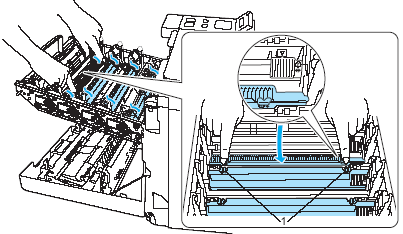
-
Clean the corona wire inside the drum unit by gently sliding the green tab from left to right and right to left several times.
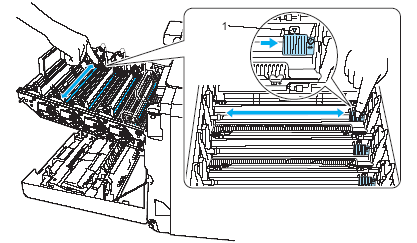
-
Close the corona wire cover.
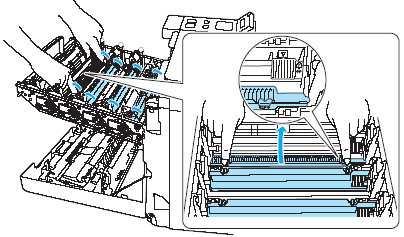
-
Repeat STEPS a-c to clean each of the remaining corona wires.
Be sure to return the tab to the home position (1). If you do not, printed pages may have a vertical stripe.
-
Push to release the latches of the white corona wire cover (1), and then open the cover.
-
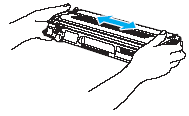
Unpack the new toner cartridge. Hold the cartridge with both hands and gently rock it five or six times to spread the toner evenly inside the cartridge.
-
Remove the protective cover.

-
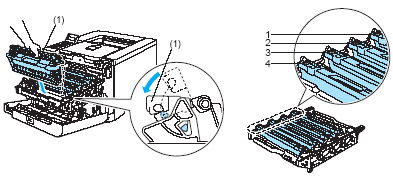
Hold the handle of the toner cartridge and slide the toner cartridge into the drum unit. Make sure that you match the toner cartridge color to the same color label on the drum unit, and make sure that you fold down the toner cartridge handle (1) once the toner cartridge is in place. Repeat this for all the toner cartridges.
-
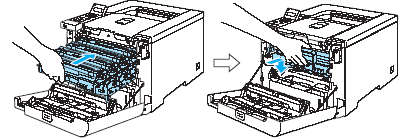
Put the drum unit back in the printer.
-
Close the front cover of the printer.
