PT-E550W
 |
คำถามที่พบบ่อย และการแก้ปัญหาเบื้องต้น |
How to create serialized labels (Pro Label Tool)
The screens may differ depending on your device.
Make sure you select the item from the [Field] drop-down list for each of the lines that you want to include on your printed label.
-
Tap [Connect database/serialize] in the edit screen, and then select [New Data to serialize].

-
Select [Enter data...serialize] and type the number you like, and then tap [Serialize].

-
Tap the [Range] box and specify the range you want.
-
Set the values you want in the [Incremented by] and [Count] fields, and then select "↓" in [Output direction].
Incremented by: increase per count
Count: number of entries per series
For example, when setting [Incremented by] to "1" and [Count] to "4", the labels will be serialized as follows: P1 P2 P3 P4.

To serialize multiple selected ranges, select the [Advanced serialize] check box, and then specify the necessary items.
-
Tap [DONE]. The contents set in step 4 appear in the [Database] list.

-
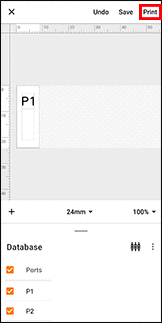
Pull down the [Database] area, and then tap [Print].

-
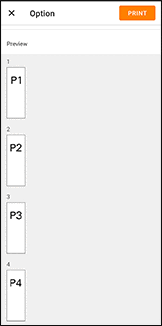
Swipe up and check the preview.

-
Tap [PRINT].
หากคำถามของท่านยังไม่ได้รับคำตอบ ท่านได้ลองดูคำถามข้ออื่นๆ แล้วหรือไม่?
ท่านได้ลองดูคู่มือแล้วหรือไม่?
หากท่านต้องการความช่วยเหลือเพิ่มเติม โปรดติดต่อฝ่ายบริการลูกค้าของบราเดอร์
รุ่นที่เกี่ยวข้อง
PT-E550W, PT-P750W, PT-P900W, PT-P950NW
ส่วนแสดงความคิดเห็น
เพื่อช่วยเราปรับปรุงการให้การสนับสนุน โปรดแสดงความคิดเห็นเพื่อตอบกลับให้เราทราบตามด้านล่างนี้


