TD-4520TN
Vanliga frågor & felsökning |
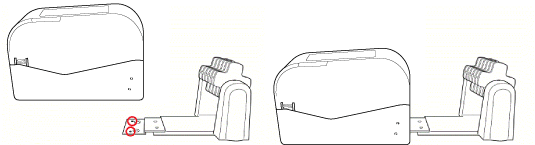
How to attach the External Roll Mount (Optional)
Movie: How to attach the External Roll Mount (Optional)
*The video clip is being streamed from YouTube.
-
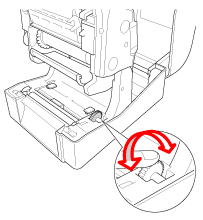
Tighten the screws of the metal fittings of the extended plate.

-
Attach the extended plate to the bottom of the printer.
-
Insert a 76.2 mm (3") Label Spindle into the paper roll. Then, install it on the External Roll Mount.
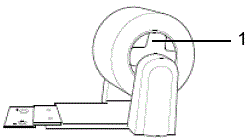
1. 76.2 mm (3") Label Spindle -
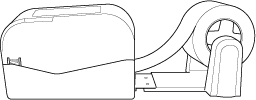
Feed the media through the Rear Label Feed Slot.
-
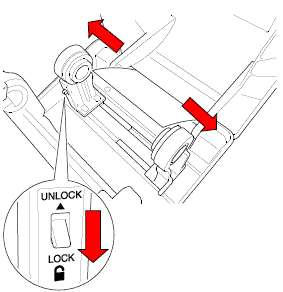
Open the Roll Compartment Cover. Slide the Roll Guides outwards, and then align the paper width with the Roll Guides. Push down the LOCK switch to lock the Roll Guides.
-
Install the label. Turn the Media Guide Hub, and match the media guide width to the paper width.
-
Use the BPM (Brother Printer Management Tool) to set the paper size and the media sensor type, and calibrate the selected sensor.
-
Start the BPM. > Click the Printer Configuration button. > Set the Paper Width, Paper Height, Media Sensor and Gap in the FBPL tab, and click the Set button. > Make sure that the settings is activated by clicking the Get button.

-
Click the Printer Function button. > Set the media sensor type, and click the Calibrate button.

Calibrate the Gap/Black Mark Sensor when changing media.
-
Start the BPM. > Click the Printer Configuration button. > Set the Paper Width, Paper Height, Media Sensor and Gap in the FBPL tab, and click the Set button. > Make sure that the settings is activated by clicking the Get button.
Feedback om innehållet
Hjälp oss att göra vår support bättre genom att lämna din feedback nedan.