HL-5450DN
Часто задаваемые вопросы и устранение неполадок |
Install the optional tray unit.
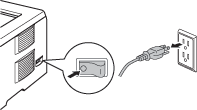
- Turn off the printer power switch, and remove all the cables from the machine.

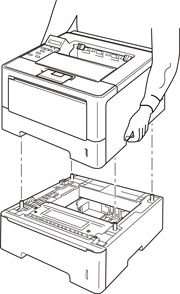
- Lift the printer carefully with both hands and place it onto the lower tray unit, so that the alignment pins of the lower tray unit are inserted into the guide holes on the bottom of the printer.

Driver configuration for Windows users:
Follow the instructions below to configure the printer driver to work with the lower tray.
- Open Printer Properties. (Click here to see how to open Printer Properties.)
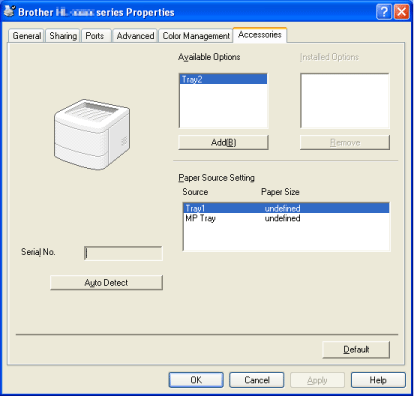
- Choose the Accessories tab and click Auto Detect, once the lower trays and paper size have been detected then click Apply.
(Under certain conditions Auto Detect may not be available. If this situation occurs, you can manually add the lower tray. In Available Options select the Tray 2, click Add and then Apply.)

For Macintosh users:
The printer driver is already configured for use with the lower paper trays. No additional steps are required.
Если вам не удалось найти ответ на свой вопрос, вы не пробовали просмотреть ответы на другие вопросы?
Отзывы о материалах
Чтобы помочь нам улучшить поддержку пользователей, просим вас поделиться своим мнением, ответив на вопросы ниже.
