DCP-9270CDN
Întrebări frecvente şi depanare |
Scan a document and save the scanned image to a folder on a local or network hard disk using the SCAN key on my Brother machine (video instructions available)
You can scan a document and save the scanned image to a preferred folder by pressing the SCAN key on the control panel of your Brother machine.
NOTE: Videos shown below are from a representative product and may differ from your Brother machine.
* If your Brother machine has a touchscreen, please follow the steps under "For touchscreen models" below.
If you want to change the scan settings, click here to see the details of how to change scan settings.
For USB interface users:
-
Load your document.
If you want to use 2-sided (duplex) scanning, load your document face up, top edge first in the ADF. -
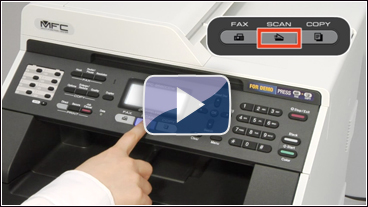
Click on the image below to play the video instructions.

* This movie is being streamed from YouTube. (Opening new window.)- Press SCAN.
- Press the Up or Down arrow key to choose Scan to PC. Press OK.
- Press the Up or Down arrow key to choose File. Press OK.
- Press the Up or Down arrow key to choose 1sided, 2sided (L)edge or 2sided (S)edge. Press OK.
- Press Black (Mono) Start or Color (Colour) Start or Start.
For network users:
-
Load your document.
If you want to use 2-sided (duplex) scanning, load your document face up, top edge first in the ADF. -
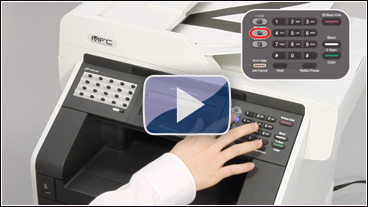
Click on the image below to play the video instructions.
* This movie is being streamed from YouTube. (Opening new window.)- Press SCAN.
- Press the Up or Down arrow key to choose Scan to PC. Press OK.
- Press the Up or Down arrow key to choose File. Press OK.
- Press the Up or Down arrow key to choose 1sided, 2sided (L)edge or 2sided (S)edge. Press OK.
-
Press the Up or Down arrow key to choose the destination computer you want to receive the data.
Note:
If the computer is not displayed, click here to see how to solve the issue. - Press OK.
- If the LCD prompts you to enter a PIN number, enter the 4-digit PIN number for the destination computer on the control panel and press OK.
- Press Black (Mono) Start or Color (Colour) Start or Start.
<For touchscreen models>
For USB interface users:
-
Load your document.
If you want to use 2-sided(duplex) scanning, load your document face up, top edge first in the ADF. -
Click on the image below to play the video instructions.
* This movie is being streamed from YouTube. (Opening new window.)- Press Scan.
- Press Scan to PC.
- Press File.
-
If you want to use 2-sided (duplex) scanning, go to STEP v.
If you do not want to use 2-sided (duplex) scanning, go to STEP vi. -
Press Duplex Scan.
Press DuplexScan :LongEdge or DuplexScan :ShortEdge. - Press Black (Mono) Start or Color (Colour) Start or Start.
For network users:
-
Load your document.
If you want to use 2-sided (duplex) scanning, load your document face up, top edge first in the ADF. - Press Scan.
- Press Scan to PC.
- Press File.
-
Press the UP OR DOWN ARROW key to display the destination computer you want to receive the data.
Note:
If the computer is not displayed, click here to see how to solve the issue. - Press the destination computer and press OK.
- If the LCD prompts you to enter a PIN number, enter the 4-digit PIN number for the destination computer on the control panel, and press OK.
-
If you want to use 2-sided (duplex) scanning, go to STEP 9.
If you do not want to use 2-sided (duplex) scanning, go to STEP 10. -
Press Duplex Scan.
Press DuplexScan :LongEdge or DuplexScan :ShortEdge. - Press Black (Mono) Start or Color (Colour) Start or Start.
You can scan from your computer with the useful application as ControlCenter. Please refer to related FAQ's about how to use the ControlCenter with Windows/ Macintosh.
Întrebări frecvente asociate
- Change the scan settings for scanning from ControlCenter2 or the SCAN key (For Macintosh)
- Change the scan settings for scanning from ControlCenter4 or the SCAN key (For Windows)
- Scan a document and save the scanned image to a folder on a local or network hard disk (For Macintosh)
- Scan a document and save the scanned image to a folder on a local or network hard disk (For Windows)
- I cannot find the destination computer on the network when I try to scan a document using the machine's Scan key or control panel.