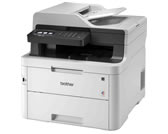
MFC-L3750CDW
Perguntas mais frequentes e Resolução de problemas |
Set the Date and Time
DCP-L3510CDW/DCP-L3517CDW
- Press Menu.
- Press
 or
or  to select the following:
 - Select [Initial Setup]. Press OK.
- Select [Date&Time]. Press OK.
- Select [Date&Time]. Press OK.
- Press
 or
or  to set the last two digits of the year. Press OK. Repeat these steps for setting the month and day.
 - Press
 or
or  to display the [12h Clock] or [24h Clock] option, and then press OK.
 - Do one of the following:
If you selected [12h Clock] as the format in the [Date&Time] setting, press
 or
or  to set the hour. Press OK. Repeat these steps for setting the minute.
 Press
 or
or  to display the [AM] or [PM] option, and then press OK.
 If you selected [24h Clock] as the format in the [Date&Time] setting, press
 or
or  to set the hour. Press OK. Repeat these steps for setting the minute.
 (For example: enter 19:45 for 7:45 PM.)
- Press Stop/Exit.
DCP-L3550CDW/MFC-L3710CW/MFC-L3730CDN/MFC-L3750CDW/MFC-L3770CDW
- Press
 .
. - Enter the last two digits of the year using the LCD, and then press [OK].
- Enter the two digits for the month using the LCD, and then press [OK].
- Enter the two digits for the day using the LCD, and then press [OK].
- Press [Time].
- Enter the time (in 24-hour format) using the LCD, and then press [OK].
(For example: enter 19:45 for 7:45 PM.)
- Press
 .
.
Feedback sobre o conteúdo
Para nos ajudar a melhorar o nosso suporte, dê-nos abaixo o seu feedback.
