TJ-4021TN
Odpowiedzi na często zadawane pytania i rozwiązywanie problemów |
How to load the Ribbon
Movie: How to load the Ribbon
*The video clip is being streamed from YouTube.
Ribbon Loading Path
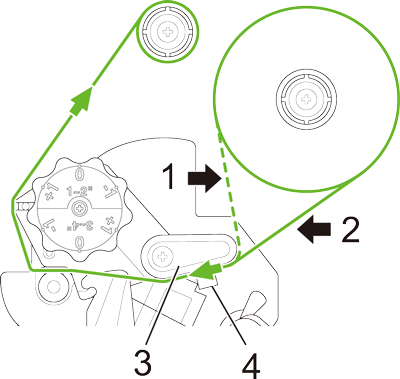
1. Ink coated inside
2. Ink coated outside
3. Ribbon guide bar
4. Ribbon end sensor
-
Open the Media Cover.
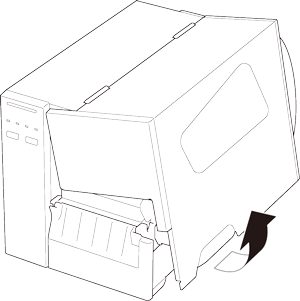
-
Install the ribbon onto the Ribbon Supply Spindle, and the Paper Core onto the Ribbon Rewind Spindle.
Firmly insert the ribbon all the way to the back in the direction shown in the illustration so that the ink coated side faces the printing side of the label.
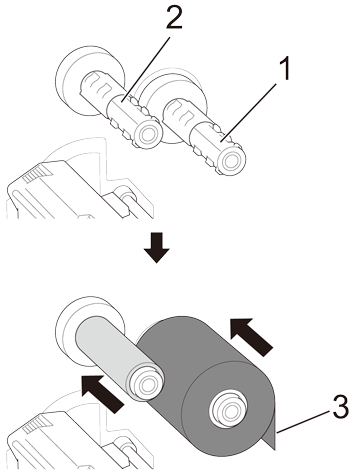
1. Ribbon Supply Spindle
2. Ribbon Rewind Spindle
3. Ink coated side -
Push the Print Head Release Lever to open the Print Head.
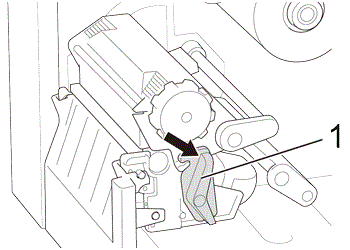
1. Print Head Release Lever -
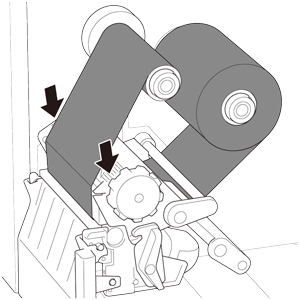
Thread the ribbon under the ribbon guide bar and through the ribbon sensor slot following the loading path printed on the Label Printer Cover.
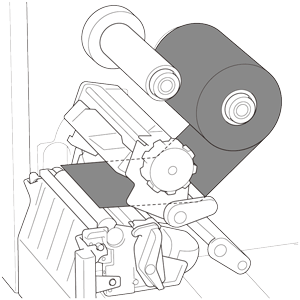
-
Adhere the ribbon leader onto the Ribbon Rewind Paper Core. Keep the ribbon flat and without wrinkles.
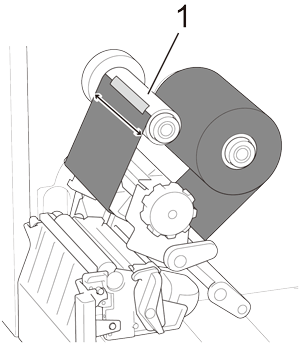
1. Ribbon Rewind Paper Core
-
Wind the Ribbon Rewind Spindle clockwise about three to five turns until the ribbon is smooth, flat and without wrinkles.
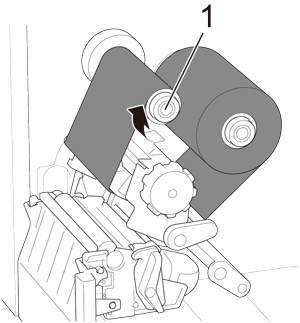
1. Ribbon Rewind Spindle -
Close the Print Head by pushing down on both sides and make sure it locks into place.
Jeśli Twoje pytanie pozostaje bez odpowiedzi, czy sprawdziłaś/sprawdziłeś inne odpowiedzi na często zadawane pytania?
Opinie dotyczące treści
Aby pomóc nam udoskonalać naszą pomoc techniczną, przekaż poniżej swoją opinię.
