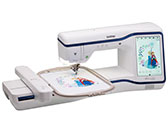
Innov-is XE1
Odpowiedzi na często zadawane pytania i rozwiązywanie problemów |
How do I attach the Embroidery foot “W+” with LED pointer or “W”?
-
When attaching an embroidery foot, always press
 on the screen. You may accidentally press the [Start/Stop] button and possibly cause injury.
 - Be sure to use embroidery foot W+ with LED pointer when doing embroidery. Using another embroidery foot may cause the needle to strike the embroidery foot, causing the needle to bend or break and possibly cause injury.
-
Press
 (Needle position button) to raise the needle.
-
Press
 to lock all keys and buttons.
If the message [OK to automatically lower the presser foot?] appears on the LCD screen, press [OK] to continue.Before replacing the needle, cover the hole in the needle plate with fabric or paper to prevent the needle from falling into the machine.
-
Raise the presser foot lever.
-
Remove the connector of the embroidery foot W+ with LED pointer from the connector on the back of the machine.
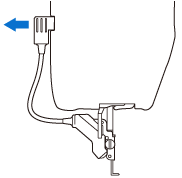
-
Use the included disc-shaped screwdriver to loosen the screw for the embroidery foot, and then remove the embroidery foot W+ with LED pointer.
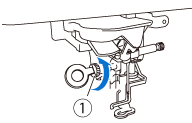
-
Position the embroidery foot W+ with LED pointer on the presser foot bar by aligning the notch of the presser foot to the large screw.
Side view
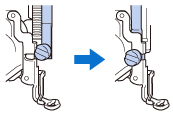
-
Hold the embroidery foot in place with your right hand, and then use the disc-shaped screwdriver to securely tighten the screw for the embroidery foot.
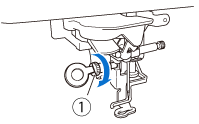
(1) Screw for embroidery foot Use the disc-shaped screwdriver to firmly tighten the screw for the embroidery foot. If the screw is loose, the needle may strike the embroidery foot and possibly cause injury.
-
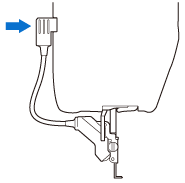
Plug the connector of the embroidery foot W+ with LED pointer into the jack on the back left side of your machine.
-
Press
 to unlock all keys and buttons.
>> All keys and operation buttons are unlocked, and the previous screen is displayed.
Jeśli Twoje pytanie pozostaje bez odpowiedzi, czy sprawdziłaś/sprawdziłeś inne odpowiedzi na często zadawane pytania?
Opinie dotyczące treści
Aby pomóc nam udoskonalać naszą pomoc techniczną, przekaż poniżej swoją opinię.
