How to use the Numbering function (P-touch Editor 5.x for Windows)
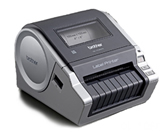
For TD-4T/TJ-4T series:
To use P-touch Editor, download and install “Printer Driver for P-touch Editor” from the [Downloads] section of this website.
The numbering function is used to make a series of sequential alpha/numeric labels.
The following steps show how to create sample labels below using Express mode.
Click .
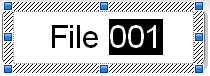
Type "File 001" and highlight "001".
You can insert a space instead of "0", such as "__1". If you do not want to leave any space, we recommend creating labels separately for 1-digit, 2-digit and 3-digit numbers.
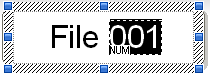
Select [Format] - [Numbering].
The NUM icon will appear.
Click to display the print dialog box.
Make sure that the "Numbering:" check box is checked. Specify the number of labels to be printed in the "Count:" box and then click [Print].
If you do not want the NUM icon to be displayed:
Select [Tools] - [Options...].
Click the [Display] tab.
Clear the "Object Attribute Icon" check box.
You can also use the Numbering function on Professional mode. For more information, see "P-touch Editor Help".
Si no obtuvo una respuesta, ¿ha revisado otras preguntas frecuentes?

 .
.

 to display the print dialog box.