MFC-J6945DW
Preguntas frecuentes y Solución de problemas |
Print on Both Sides of the Paper Automatically (Automatic 2-sided Printing) (Windows®)

- Make sure the jam clear cover is closed.
- If paper is curled, straighten it and put it back in the paper tray.
- Use regular paper. DO NOT use bond paper.
- If the paper is thin, it may wrinkle.
- Select the print command in your application.
- Select Brother XXX-XXXX (where XXXX is the name of your model), and then click the printing properties or preferences button.The printer driver window appears.
- Click the Basic tab.
- In the Orientation field, select the Portrait or Landscape option to set the orientation of your printout.

If your application contains a similar setting, we recommend that you set the orientation using the application.
- Click the 2-sided / Booklet drop-down list, and then select 2-sided.
- Click the 2-sided Settings button.
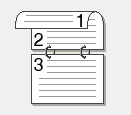
- Select one of the options from the 2‑sided Type menu.When 2-sided is selected, four types of 2-sided binding are available for each orientation:Option for PortraitDescriptionLong Edge (Left)
 Long Edge (Right)
 Short Edge (Top)
 Short Edge (Bottom)
 Option for LandscapeDescriptionLong Edge (Top)
 Long Edge (Bottom)
 Short Edge (Right)
 Short Edge (Left)
- Select the Binding Offset check box if you want to specify the offset for binding in inches or millimeters.
- Click OK to return to the printer driver window.
- Change other printer settings if needed.

The Borderless feature is not available when using this option.
- Click OK again, and then complete your print operation.
Comentarios sobre el contenido
Para ayudarnos a mejorar el soporte, bríndenos sus comentarios a continuación.
