VR
FAQ e Risoluzione dei problemi |
How do I wind the bobbin?
- Use the included metal bobbin when winding the bobbin with the machine.
- Circled numbers on the thread guide assembly indicate the threading path for winding the bobbin.
Prepare the metal bobbin and the spool of bobbin thread.
-
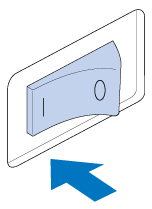
Turn the main power to ON.
-
Align the groove in the bobbin with the spring on the bobbin winder shaft, and set the bobbin on the shaft.
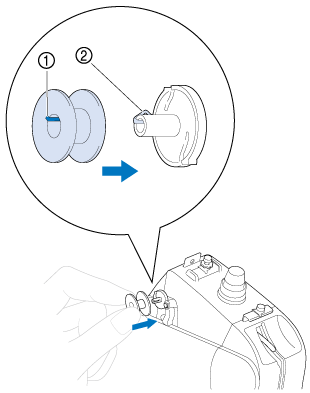
(1)Groove in the bobbin
(2)Spring on the shaft -
Place the thread spool on either the first or second spool pin on the left side. Push the spool cap onto the spool pin as far as possible to secure the thread spool.
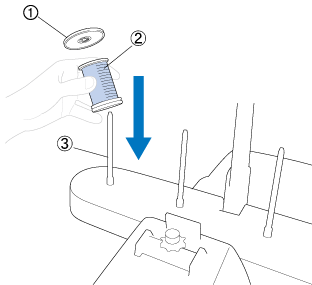
(1)Spool cap
(2)Thread spool
(3)Spool pin -
Pass the thread through the hole in the thread guide just above the spool from the back to the front.
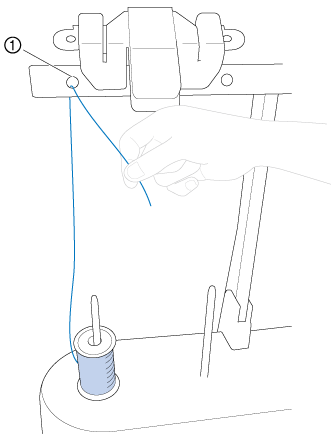
(1)Hole in the thread guide above the spool
-
Pass the thread through thread guide hole from front side to back.
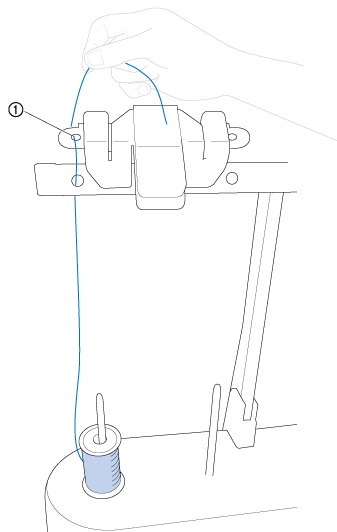
(1)Thread guide hole -
Pass the thread around the pretension disc as shown in the illustration. Make sure that the thread is correctly fed into the tension disc.
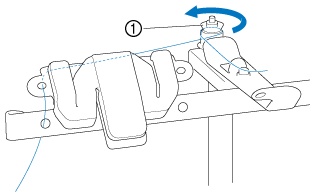
(1)Pretension disc -
Pass the thread through the thread guide hole towards you as shown in the illustration.
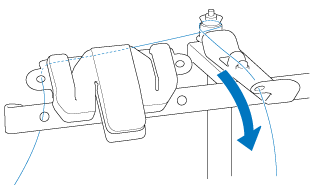
-
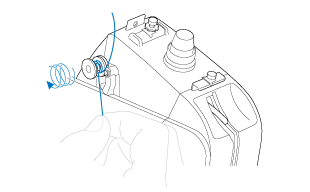
Wind the thread clockwise around the bobbin 4 or 5 times, as shown in the illustration.
-
Pass the end of the thread through the guide slit on the bobbin winder seat, and pull the thread. The cutter will cut the thread.
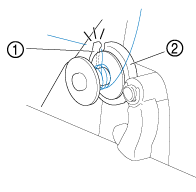
(1)Guide slit (with built-in cutter)
(2)Bobbin winder seatBe sure to follow the procedure described. If the bobbin is wound without the thread being cut with the cutter, when the bobbin thread runs low, the thread may become tangled around the bobbin and cause the needle to break.
-
Push the bobbin winding switch to the left, until it clicks into place.
>> The bobbin winding window will be displayed on the LCD screen.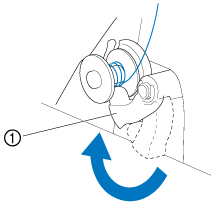
(1)Bobbin winding switch -
Press " Start ".
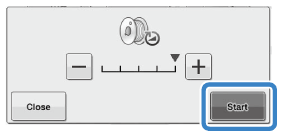
>>The bobbin starts winding. The bobbin stops rotating when bobbin winding is completed. The bobbin winding switch will automatically return to its original position.- " Start " changes to " Stop " while the bobbin is winding. Press " Stop " if you want to stop before the bobbin is fully wound.
- Stay near the machine while winding the bobbin to make sure the bobbin thread is being wound correctly. If the bobbin thread is wound incorrectly, press " Stop " immediately to stop the bobbin winding.
-
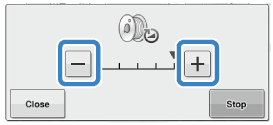
You can change the winding speed by pressing " - " (to decrease) or " + " (to increase) in the bobbin winding window.
-
Press " Close " to minimize the bobbin winding window. Then, you can perform other operations, such as selecting a stitch or adjusting the thread tension, while the bobbin is being wound.
-
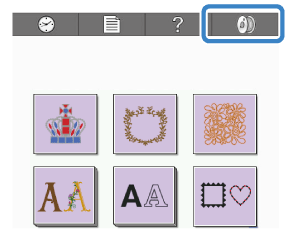
Press
 (in top right of the LCD screen) to display the bobbin winding window again.
-
Cut the thread with the cutter and remove the bobbin.

(1) Cutter When removing the bobbin, do not pull on the bobbin winder seat. Doing so could loosen or remove the bobbin winder seat, and could result in damage to the machine.
-
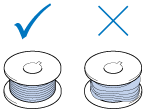
Check that the bobbin thread has been wound correctly, otherwise the needle may break or the thread tension will be incorrect.
-
Be sure to clean the bobbin case each time that the bobbin is changed. Thread wax and dust easily collect around the hole in the tension-adjusting spring on the bobbin case, resulting in an incorrect thread tension. For details, refer to "Cleaning the bobbin case".
-
Be sure to check the tension of the bobbin thread each time that the bobbin is changed.
-
Depending on the bobbin thread type, the tension of the bobbin thread may differ. Be sure to check the tension of the bobbin thread and adjust the tension if necessary. For a metal bobbin, use both weights, large (L) and small (S). For detailed instructions on "How to adjust the bobbin tension".

(1)Weight (L)
(2)Weight (S)
-
Check that the bobbin thread has been wound correctly, otherwise the needle may break or the thread tension will be incorrect.
Feedback sui contenuti
Di seguito è possibile fornire il proprio feedback che ci consentirà di migliorare il servizio assistenza.
