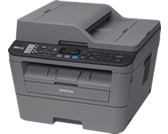
MFC-L2700DW
FAQ et Diagnostic |
Clean the drum unit
If your printout has dots or other repeating marks at 94 mm (3.7 in.) intervals, the drum may have foreign material, such as glue from a label stuck on the drum surface. Follow the steps below to clean the drum unit.
-
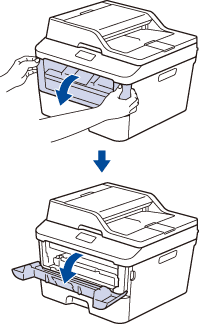
Open the front cover.
-
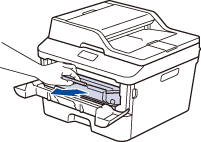
Remove the toner cartridge and drum unit assembly from the machine.
-
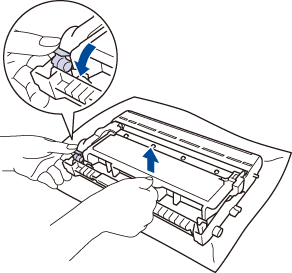
Push down the green lock lever and take the toner cartridge out of the drum unit.
-
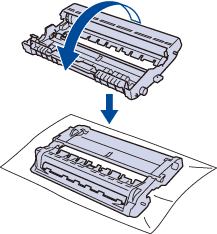
Turn the drum unit as shown in the illustration. Make sure that the drum unit gear is on the left side.
-
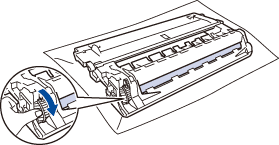
Turn the edge of the drum unit toward you by hand while looking at surface of the suspected area.
-
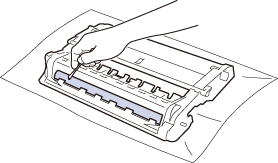
Wipe the surface of the drum gently with a dry cotton swab until the mark on the surface comes off.
-
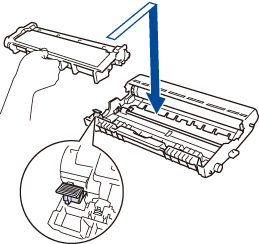
Put the toner cartridge firmly into the drum unit until you hear it lock into place.
-
Install the toner cartridge and drum unit assembly back into the machine.
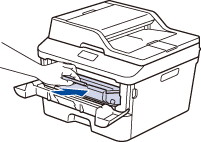
- Close the front cover of the machine.
Si vous n'avez pas obtenu de réponse satisfaisante à votre question, avez-vous vérifié d'autres FAQ?
Commentaires sur le contenu
Merci d'indiquer vos commentaires ci-dessous. Ils nous aideront à améliorer notre support.
