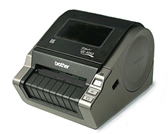
QL-1050
Preguntas frecuentes y solución de problemas |
How to install the printer driver for serial interface
To install the printer driver for the serial interface, use the following steps:
You need to prepare a serial cable to connect the QL series printer to your PC.
For information on serial cable available for this connection, see Appendix: Serial port settings [PDF/80KB].
- Insert the CD-ROM supplied with the product into the CD-ROM drive.
- Open the [Printers and Faxes] folder.
-
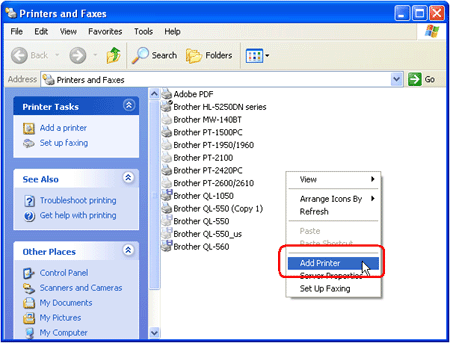
Right-click on the [Printers and Faxes] window and select [Add Printer].
-
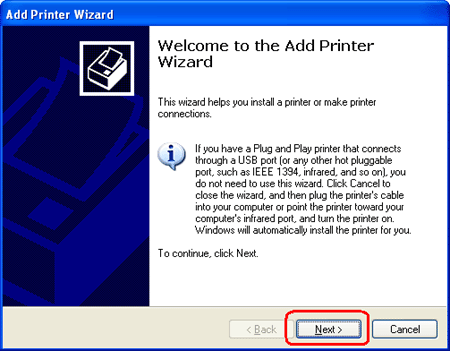
Click the [Next] button.
-
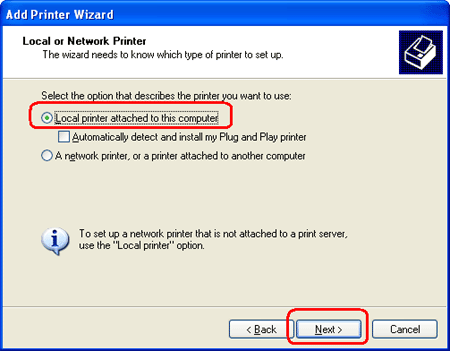
Select [Local printer attached to this computer] and click the [Next] button.
-
Select [COM1: [Serial Port]] from the dropdown list and click the [Next] button.

-
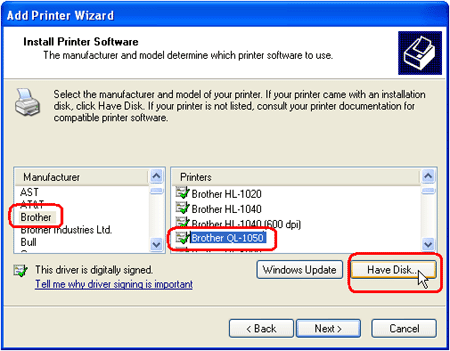
Select [Brother QL-1050] and click the [Have Disk] button.
-
When the [Install From Disk] dialog box appears, specify the directory in the [Copy manufacturer's files from] box as follows:
CD DRIVE:UK\P-touch\Drivers\QL-1050\Win2000\win2kdrv
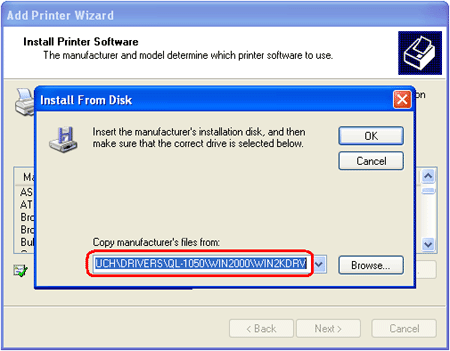
Click the [OK] button. -
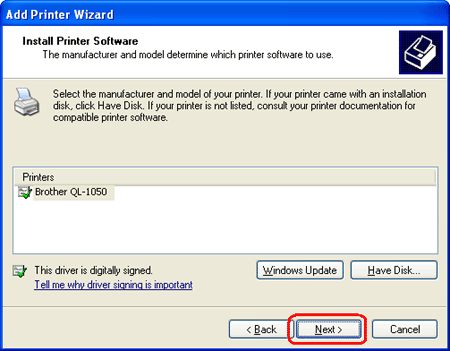
Select [Brother QL-1050] and then click the [Next] button.
-
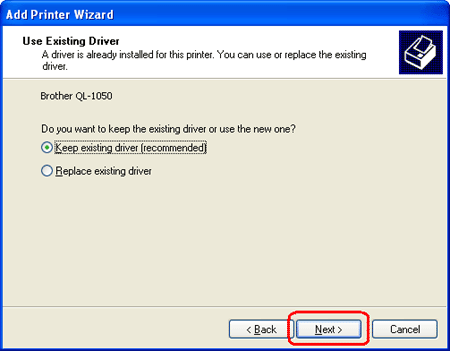
If the following dialog box appears, click the [Next] button.
-
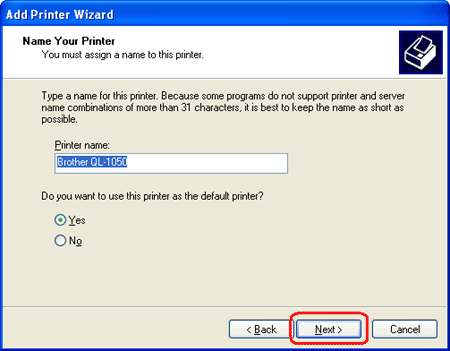
Type your desired printer name in the [Printer name] box and then click the [Next] button.
-
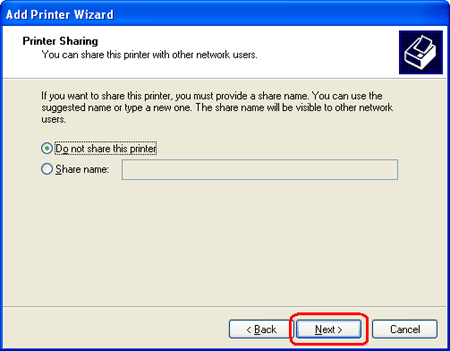
Select [Do not share this Printer] and click the [Next] button.
-
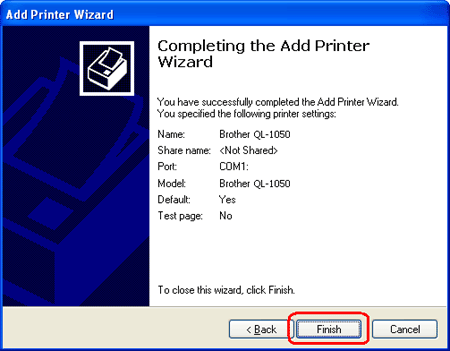
The procedure has been completed. Click the [Finish] button.
En el caso de que no haya obtenido una respuesta a su pregunta, compruebe las preguntas frecuentes adicionales.
En el caso de que necesite ayuda adicional, póngase en contacto con el servicio de atención al cliente de Brother:
Comentarios sobre el contenido
Con el fin de mejorar nuestro servicio de asistencia, facilite sus comentarios a continuación.
