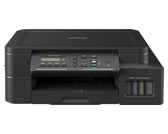
DCP-T520W
Nejčastější dotazy a pokyny pro odstraňování potíží |
Set the Date and Time
(MFC models)
The LCD displays the date and time. If they are not current, re-enter them. You can add the date and time to each fax you send by setting your Station ID.
(DCP models)
If the machine's power has been off, the machine's date and time may not be current. Re-enter them.
DCP-T520W/DCP-T525W/DCP-T720DW/DCP-T725DW/DCP-T820DW/DCP-T825DW
- Press Menu.
- Press
 or
or  to make your selections:
 - Select [Initial Setup]. Press OK.
- Select [Date & Time]. Press OK.
- Select [Date & Time]. Press OK.
- Press
 or
or  on the control panel to set the last two digits of the year. Press OK. Repeat these steps for setting the month and day.
 - Press
 or
or  on the control panel to set the hour. Press OK. Repeat these steps for setting the minute.
 - Press Stop/Exit.
MFC-T920DW/MFC-T925DW
- Press Settings.
- Press
 or
or  to make your selections:
 - Select [Initial Setup]. Press OK.
- Select [Date & Time]. Press OK.
- Select [Date]. Press OK.
- Enter the last two digits of the year using the dial pad, and then press OK.
- Enter the two digits for the month using the dial pad, and then press OK.
- Enter the two digits for the day using the dial pad, and then press OK.
- Press
 or
or  to select [Time], and then press OK.
 - Enter the time (in 24-hour format) using the dial pad, and then press OK.
- Press Stop/Exit.
Názory na obsah
Chcete-li nám pomoci vylepšit naši podporu, uveďte níže vaše názory.
