QL-720NW
常见问题解答与故障排除 |
How to share your printer in Windows 7 in a network-shared environment.
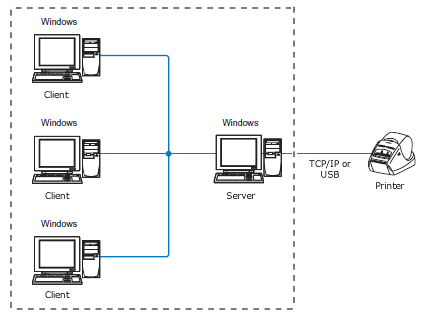
In a network-shared environment, each computer (Client computer) sends data via a centrally controlled computer (Server Computer) as below:

This type of computer is often called a "Server" or a "Print Server".
Follow the instructions below to share your Brother machine:
For printer sharing to operate correctly, please be sure that:
- The network is properly set up.
- The user access permissions for each computer are set appropriately.
Please Note: Brother does not provide support for problems that may result from misconfigured network or user settings. For details on the appropriate settings, consult your network administrator or refer to the Windows manual for help.
Server Computer Setting
- Install the printer driver. (The latest printer driver is available in the [Downloads] section of this website.)
- Click [Start] - [Devices and Printers].
- Right-click on the printer name icon and select [Printer Properties].
- Open the [Sharing] tab.
-
Select [Share this printer], (If you see the [Change Sharing Options] button, click on it.), Enter a printer name in [Share name], and click [OK].
If the client computer and the server computer use different Operating System (32-bit and 64-bit), install the printer driver which is compatible with the client Operating System to the server computer. Click [Additional Drivers...] in the [Sharing] tab and add the driver.
Client Computer Settings
To add the shared printer to the client computer, log on as an administrator and follow the instructions below:
Network Sharing Configuration
- Click [Start] – [Control Panel] – [Network and Internet].
- Click [Network and Sharing center].
- Click [Change advanced sharing settings].
- Select [Turn on network discovery] and [Turn on file and printer sharing], and then click [Save changes].
Printer Driver Installation
- Start the installation and follow the on-screen instructions.
-
In the [Connection Type] window, select [Network Shared Printer / Wired Network Connection], and then click [Next].
Check that LAN cable and the machine are connected.
-
Select your printer's queue, and then click [OK].
Contact your administrator if you do not know the location or the printer name in the network.
- Continue the installation by following the on-screen instructions.
