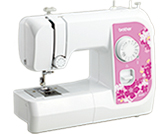
JA001
常见问题解答与故障排除 |
How do I remove or attach the presser foot ?
- Always turn off the machine before you change the presser foot. If you leave the power on and step on the controller, the machine will start and you may be injured.
- Always use the correct presser foot for the stitch pattern you have chosen. If you use the wrong presser foot, the needle may strike the presser foot and bend or break, and may cause injury.
- Only use presser feet that have been designed to be used with this machine. Using any other presser foot may cause accident or injury.
-
Turn off the machine.
-
Raise the presser foot lever.
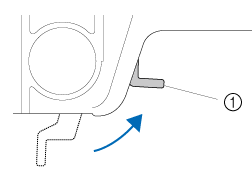
(1) Presser foot lever -
Raise the needle by turning the handwheel toward you (counterclockwise) so that the mark on the wheel points up.
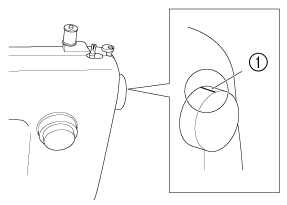
(1) Mark on the handwheel -
Press the black button at the back of the presser foot holder to release the presser foot.
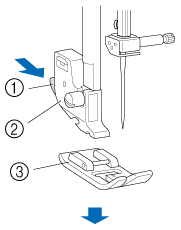
(1) Black button
(2) Presser foot holder
(3) Presser foot -
Put a different presser foot on the needle plate so that the bar on the presser foot is in line with the slot on the shank.
-
Lower the presser foot lever and fix the presser foot onto the shank. If the presser foot is in the correct place, the bar should snap in.
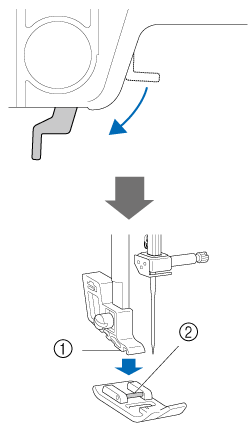
(1) Shank
(2) Bar -
Raise the presser foot lever to check that the presser foot is securely attached.
If the presser foot is not installed with the correct orientation, the needle may strike the presser foot, which may bend or break the needle and cause injury.
内容反馈
请在下方提供您的反馈,帮助我们改进支持服务。
