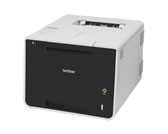
HL-L8250CDN
常见问题解答与故障排除 |
Replace Belt
Follow the steps below to replace the belt unit.
For the order number (Order No.) of the belt unit, click here to see the Consumables & Options page.
- Make sure that the machine is turned on.
-
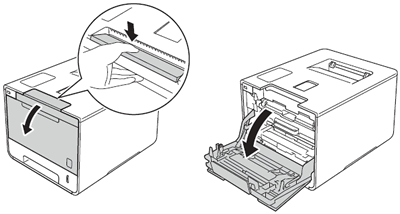
Press the front cover release button and pull open the front cover.
-
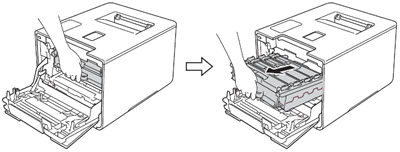
Hold the blue handle of the drum unit. Pull the drum unit out until it stops.
-
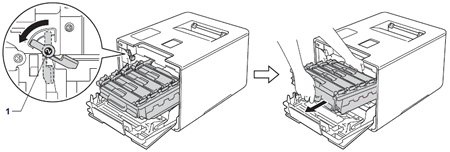
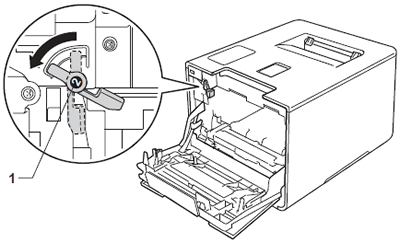
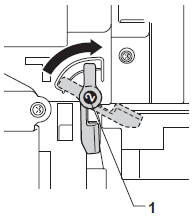
Turn the blue lock lever (1) at the left of the machine counterclockwise to the release position. Holding the blue handles of the drum unit, lift the front of the drum unit and remove it from the machine.
-
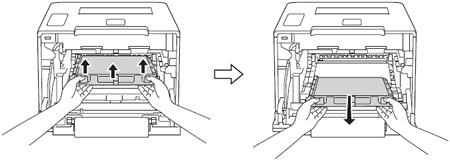
Hold the blue handle of the belt unit with both hands and lift the belt unit up, and then pull it out.
-
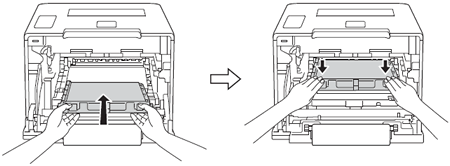
Unpack the new belt unit and install it in the machine. Make sure the belt unit is level and fits firmly into place.
-
Make sure the blue lock lever (1) is in the release position as shown in the illustration.
-
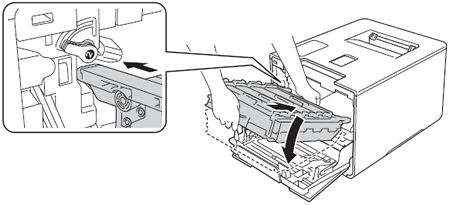
Gently slide the drum unit into the machine until it stops at the blue lock lever.
-
Turn the blue lock lever (1) clockwise to the lock position.
-
Push the drum unit in until it stops.
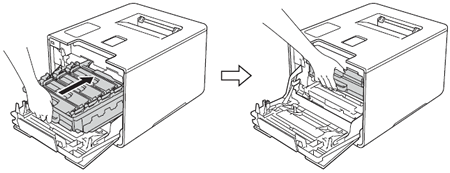
- Close the front cover of the machine.
-
Reset the belt unit counter.
- Press the Up or Down arrow key (+ or -) to choose Machine Info.. Press OK.
- Press the Up or Down arrow key (+ or -) to choose Reset Parts Life. Press OK.
- Press the Up or Down arrow key (+ or -) to choose Belt Unit.
- Read the message and press the Up arrow key (+) for Reset.
内容反馈
请在下方提供您的反馈,帮助我们改进支持服务。
