CM700
FAQ & Fehlerbehebung |
How can I transfer the created/edited data between CanvasWorkspace and my machine via a wireless network?
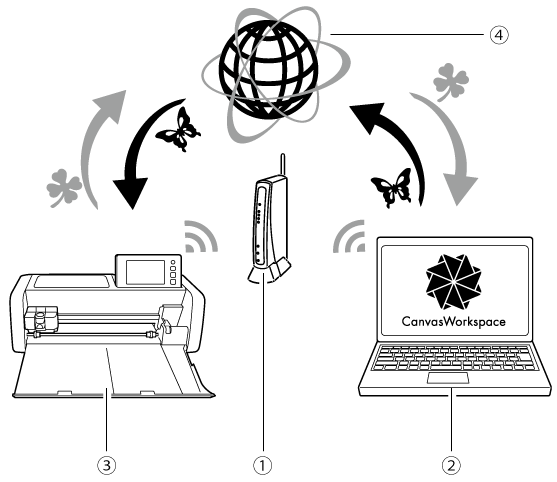
After you have registered your machine with CanvasWorkspace they will be able to communicate via a wireless network connection to transfer data back and forth.
 |
|
|
(1) (2) (3) (4) |
Wireless network access point/router
Computer/Tablet connected to wireless network access point/router Your machine Data saved to CanvasWorkspace server |
- A computer or tablet that is connected to the network and can run CanvasWorkspace is required.
- Before continuing with this procedure, setup for the connection between your machine and wireless network must be completed. If your machine is not connected to the network, first follow the procedure in How to connect my machine to a wireless network using the Setup Wizard?
Your ScanNCut machine and your CanvasWorkspace login ID will be registered together.
In the following procedures, [MACHINE] indicates operations performed from your machine, and [COMPUTER/TABLET] indicates operations performed in CanvasWorkspace.
[MACHINE]
-
Touch the [Next] key to register your machine with CanvasWorkspace.
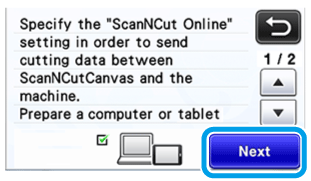
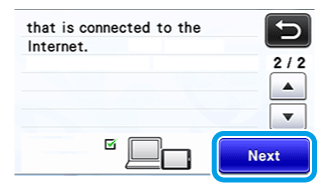
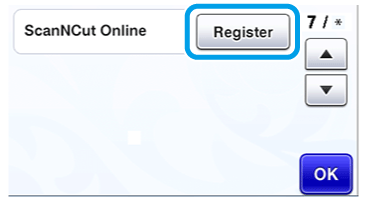
Page 1 Page 2 If you stopped the procedure after setting up the wireless network, touch the [Register] key beside [ScanNCut Online] on page 7 of the settings screen to start again with registering your machine with CanvasWorkspace.
The same screen that appeared immediately after setting up the wireless network will be displayed.
-
After the following screen, describing how to obtain the PIN code, appears, leave the screen displayed, and then continue with the next [Computer/Tablet] operation.
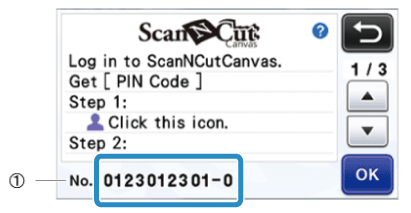
(1) Machine number Do not touch the [OK] key yet.
Your machine number appearing in the screen will be used in the following step.
[COMPUTER/TABLET]
The screens in the following descriptions are those that appear when CanvasWorkspace is opened on a computer.
The screens will appear slightly different when the application is opened on a tablet.
-
Open CanvasWorkspace on your computer, and then log in.
If you use tablet, use the CanvasWorkspace(Web). <https://canvasworkspace.brother.com>-
You can download the CanvasWorkspace from the Downloads section.
Click here to visit the download page.
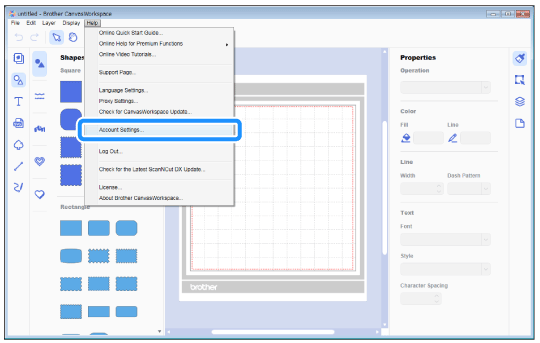
If you use the CanvasWorkspace,click [Account Settings] on the [Help] menu.
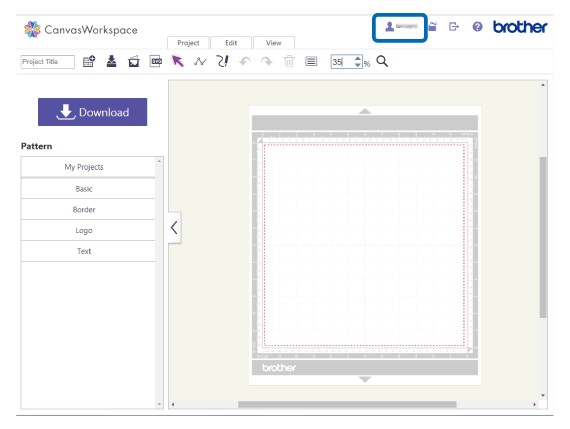
If you use the CanvasWorkspace (Web) , click in the upper-right corner of the screen.
-
You can download the CanvasWorkspace from the Downloads section.
-
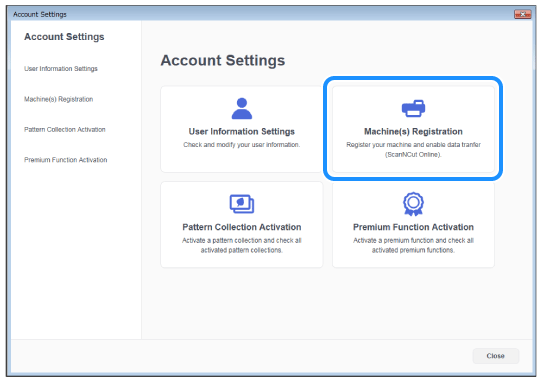
Click [Machine(s) Registration].
-
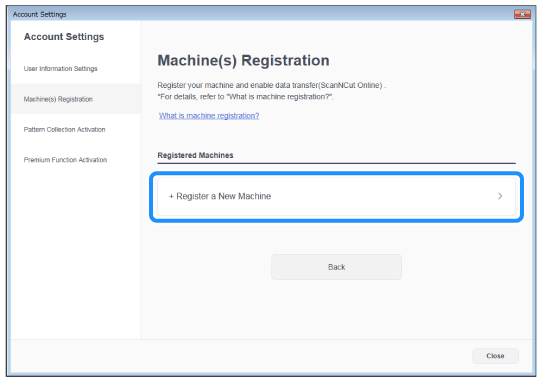
Click [Register a New Machine].
-
Type in your machine number, and then click the [OK] button.
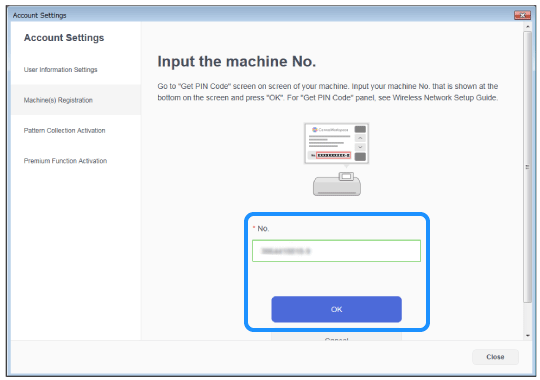
Your machine number appears on your machine in the screen shown in step 2 describing how to obtain the PIN code.
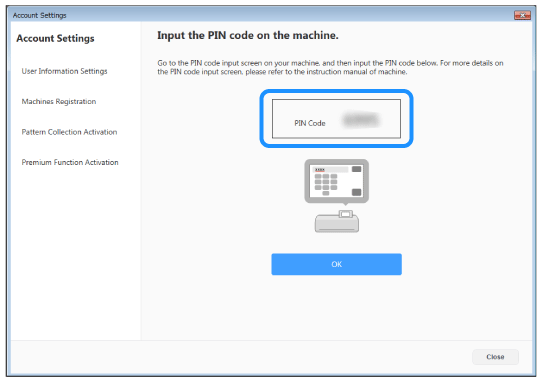
>>A four-digit PIN code appears in the screen.
[MACHINE]
-
Touch the [OK] key.
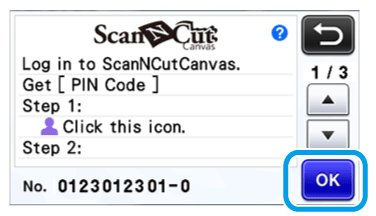
-
In the PIN code input screen on your machine, type the four-digit PIN code that appeared in the CanvasWorkspace screen, and then touch the [OK] key.
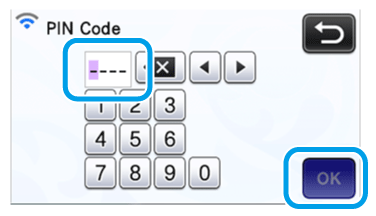
The following screen appears. -
Touch the [OK] key.
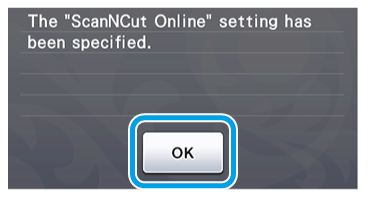
The following screen appears.
This completes the registration of your machine with CanvasWorkspace.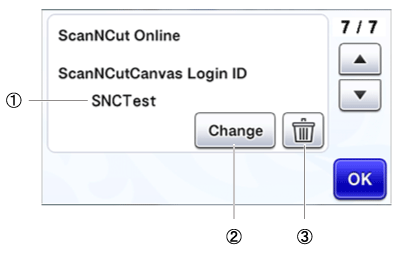
(1)
CanvasWorkspace login ID linked to your machine. (2)
Touch this key to link your machine with a different CanvasWorkspace login ID.
Then perform the registration operation again.
(3)
Touch this key to delete the currently linked CanvasWorkspace login ID.
