DCP-J1100DW
FAQ et Diagnostic |
Paper is Jammed Inside and in the Front of the Machine (Jam A Inside/Front)
If the LCD displays [Jam A Inside/Front] or [Repeat Jam A Inside/Front], follow these steps:
- Unplug the machine from the electrical socket.
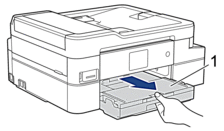
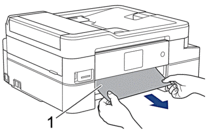
- Pull the paper tray (1) completely out of the machine.
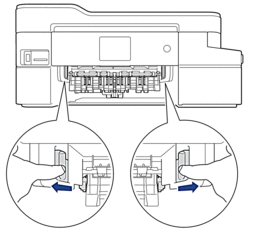
- Pull the two green levers inside the machine to release the jammed paper.
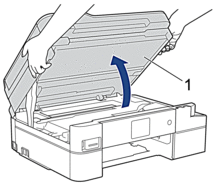
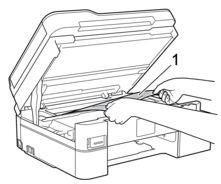
- Place both hands under the plastic tabs on both sides of the machine to lift the scanner cover (1) into the open position.
- Slowly pull the jammed paper (1) out of the machine.
- IMPORTANT
-
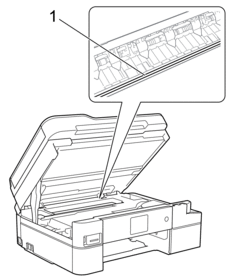
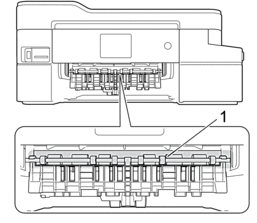
- DO NOT touch the encoder strip, a thin strip of plastic that stretches across the width of the machine (1). Doing this may cause damage to the machine.
- If the print head is in the right corner as shown in the illustration (2), you cannot move it. Follow these steps:
- Close the scanner cover, and then reconnect the power cord.
- Open the scanner cover again, and then hold down
 until the print head moves to the centre.
 - Unplug the machine from the power source and remove the jammed paper.

- If the paper is jammed under the print head, unplug the machine from the power source, and then move the print head to take out the paper.
Hold the concave areas with the triangle marks as shown in the illustration (3) to move the print head.
- If ink gets on your skin or clothing, immediately wash it off with soap or detergent.
 If your LCD error message was [Repeat Jam A Inside/Front], move the print head (if needed) to take out any paper remaining in this area. Make sure scraps of paper are not left in the corners of the machine (1) and (2).
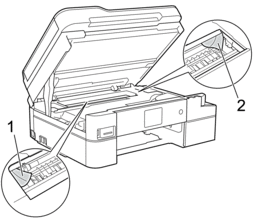
When finished, continue with the next step.
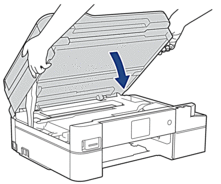
- Gently close the scanner cover using both hands.
- Slowly pull the jammed paper (1) out of the machine.
 If your LCD error message was [Repeat Jam A Inside/Front], do the following:
- Make sure you look carefully inside (1) for any scraps of paper.
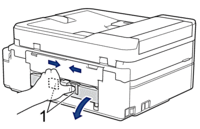
- Squeeze both levers (1), and then open the Jam Clear Cover at the back of the machine.
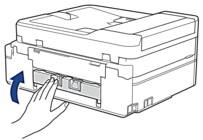
- Slowly pull the jammed paper out of the machine.

- Close the Jam Clear Cover. Make sure the cover is closed completely.
When finished, continue with the next step.
- Put the paper tray firmly back in the machine.

- While holding the paper tray in the machine, pull out the paper support (1) until it locks into place, and then unfold the paper support flap (2).

- Reconnect the power cord.
Si vous n'avez pas obtenu de réponse satisfaisante à votre question, avez-vous vérifié d'autres FAQ?
Commentaires sur le contenu
Merci d'indiquer vos commentaires ci-dessous. Ils nous aideront à améliorer notre support.