HL-4070CDW
FAQ & Fehlerbehebung |
How do I install the Optional Tray Unit?
Follow the procedure below to install the Optional Tray Unit.
-
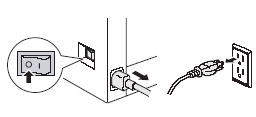
Turn off the power switch, and unplug all the cables from the printer.
-
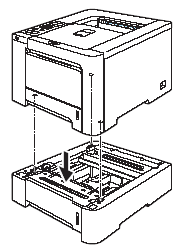
Using two people, lift the printer carefully and place it onto the lower tray unit, so that the alignment pins of the lower tray unit are inserted into the guide holes on the bottom of the printer as shown.
-
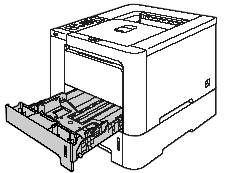
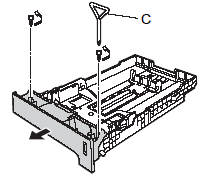
Pull the standard paper tray completely out of the printer and take the paper out of the paper tray.
-
Using the screwdriver (C), take out the two screws as shown and save them (you will need them in step 6), and then remove the paper tray front from the standard paper tray.
-
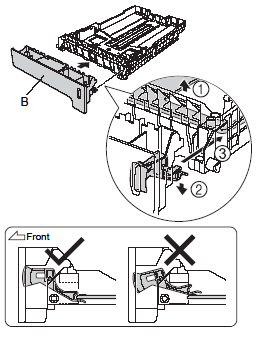
Follow the steps below to exchange the paper tray front of the standard paper tray to the new one (B):
- Carefully lift up and hold the metal plate inside the paper tray.
- While the metal plate is raised, fit the new paper tray front (B) to the front of the paper tray, making sure that the blue paper indicator lever (2) passes through the hole (3).
-
Once the paper tray front is correctly fitted, let go of the metal plate. The blue lever should sit underneath the metal plate.
-
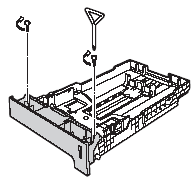
Fix the new paper tray front to the standard paper tray by putting the two screws back in (taken out in step 4). Then put the paper back in the paper tray and put the paper tray firmly back into the printer.
-
Set the paper size on the control panel of your machine.
-
For Windows Users:
-
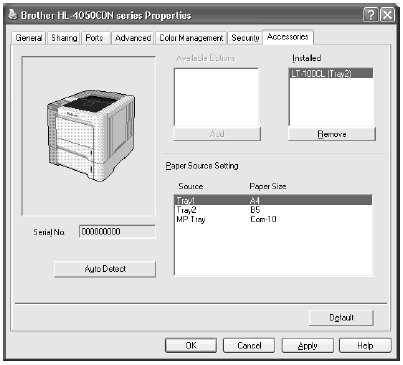
Go to Start > Settings > Control Panel > Printers (Printers and Faxes for
Windows XP users). - Right-click on your printer icon and choose Properties.
- Choose the Accessories tab and click Auto Detect.
-
Once the lower trays and paper size have been detected, then click Apply.
(Under certain conditions Auto Detect may not be available. If this situation occurs, you can manually add the options you have installed. In Available Options select the option you have installed, click Add and then
Apply.)
-
Go to Start > Settings > Control Panel > Printers (Printers and Faxes for
-
For Macintosh Users:
The printer driver is already configured for use with the lower paper trays. No
additional steps are required.
-
For Windows Users:
Rückmeldung zum Inhalt
Helfen Sie uns dabei, unseren Support zu verbessern und geben Sie uns unten Ihre Rückmeldung.