HL-4570CDW
FAQ et Diagnostic |
Replace Belt
DO NOT use cleaning materials that contain ammonia, alcohol, any type of spray, or any type of flammable substance to clean the outside or inside of the machine. Doing this may cause a fire or electrical shock.

To prevent damage to the machine from static electricity, DO NOT touch the electrodes shown in the illustration.
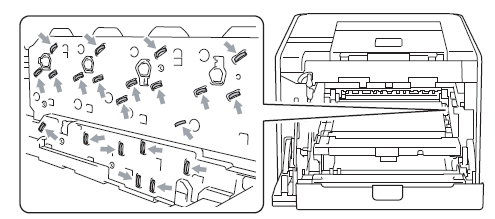
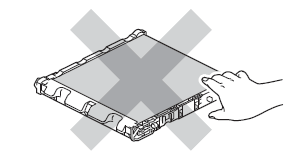
To avoid print quality problems, DO NOT touch the shaded parts shown in the illustrations.
Replace the belt unit following the steps below:
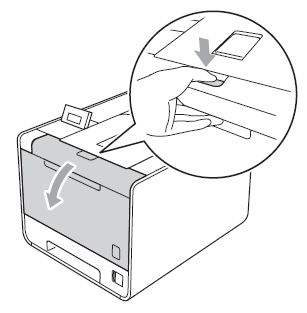
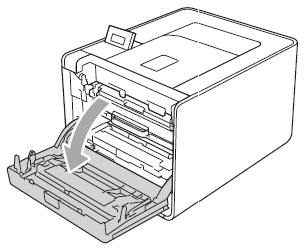
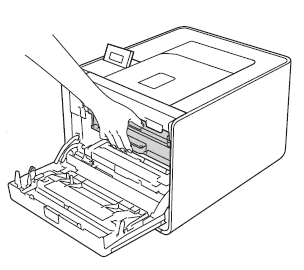
- Make sure that the machine is turned on. Press the front cover release button and then open the front cover.
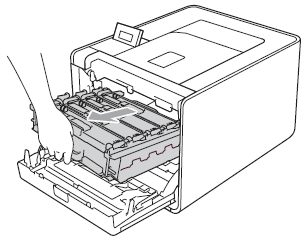
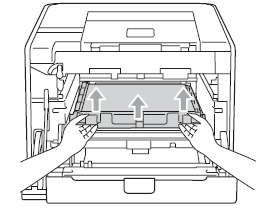
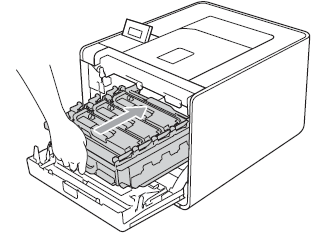
- Hold the green handle of the drum unit. Pull the drum unit out until it stops.

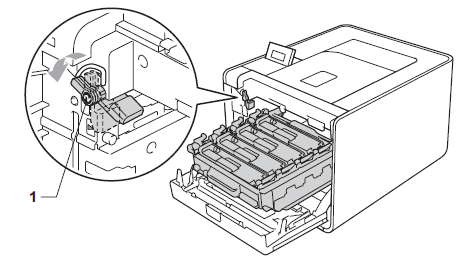
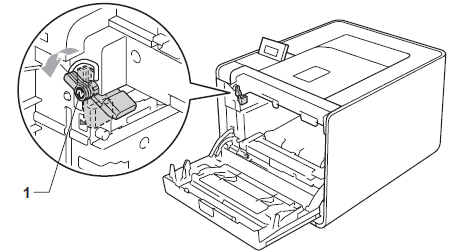
- Turn the green lock lever (1) at the left of the machine counterclockwise to the release position. Holding the green handles of the drum unit, lift the front of the drum unit and remove it from the machine.
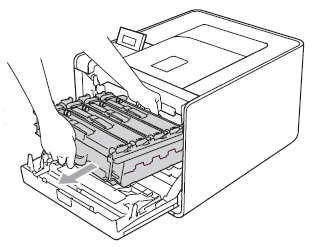
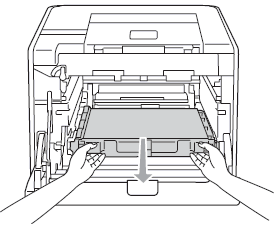
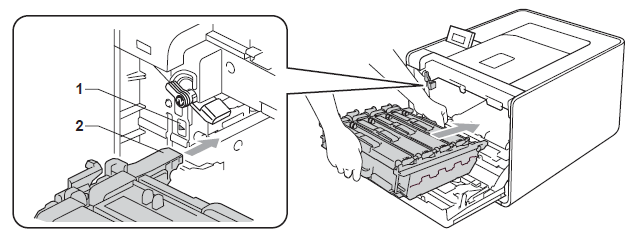
- Hold the green handle of the belt unit with both hands and lift the belt unit up, then pull it out.
- Unpack the new belt unit and put the new belt unit in the machine. Make sure the belt unit is level and fits firmly into place.
- Make sure the green lock lever (1) is in the release position as shown in the illustration.
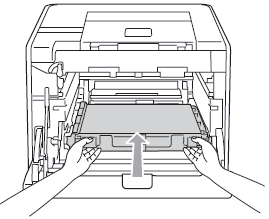
- Match the guide ends (2) of the drum unit to the c marks (1) on both sides of the machine, then gently slide the drum unit into the machine until it stops at the green lock lever.
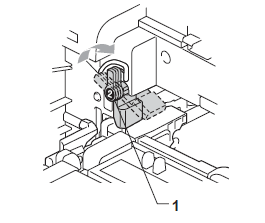
- Turn the green lock lever (1) clockwise to the lock position.
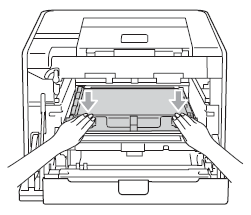
- Push the drum unit in until it stops.
- Close the front cover of the machine.
When you replace the belt unit with a new one, you need to reset the belt unit counter by completing the following steps:
- Press + or - to choose Machine Info Press OK.
- Press + or - to choose Reset Parts Life. Press OK.
- Press + or - to choose Belt Unit. Press OK.
- Press + to reset the belt unit counter.
- Press + or - to choose Machine Info Press OK.
Remarques sur le contenu
Pour nous aider à améliorer notre soutien, veuillez nous faire part de vos commentaires ci-dessous.