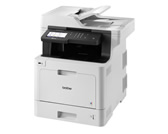
MFC-L8900CDW
FAQ et Diagnostic |
Replace the Waste Toner Box
Before starting the replacement procedure, see Related Information: Replace Supplies.
- Make sure the machine is turned on.
- Press the front cover release button and pull open the front cover.
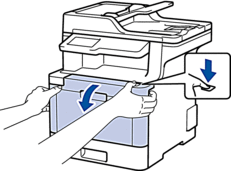
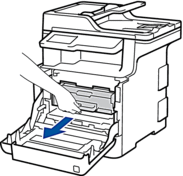
- Hold the drum unit's green handle. Pull the drum unit out of the machine until it stops.
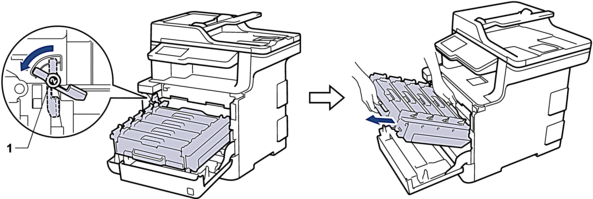
- Turn the green lock lever (1) counterclockwise until it locks in the release position. Holding the green handles of the drum unit, lift the front of the drum unit and remove it from the machine.
- IMPORTANT
-
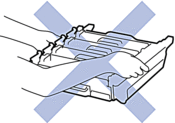
Hold the green handles of the drum unit when you carry it. DO NOT hold the sides of the drum unit.
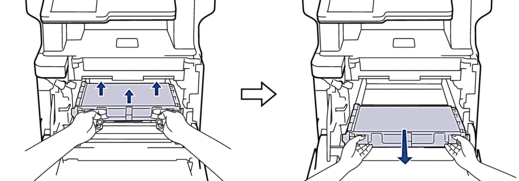
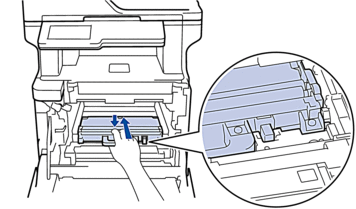
- Hold the green handle of the belt unit with both hands and lift the belt unit up, then pull it out.
- NOTE
- To avoid print quality problems, DO NOT touch the shaded parts shown in the illustrations.

- Remove the two pieces of orange packing material and discard them.
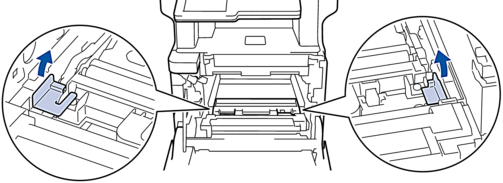
 This step is only necessary when you are replacing the waste toner box for the first time, and is not required for the replacement waste toner box. The orange packing pieces are installed at the factory to protect your machine during shipment.
 - Hold the blue handle of the waste toner box and remove the waste toner box from the machine.
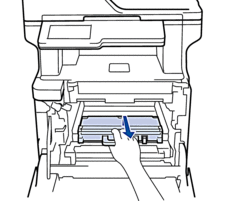
 DO NOT reuse the waste toner box.
 - Unpack the new waste toner box and install the new waste toner box in the machine using the blue handle. Make sure the waste toner box is level and fits firmly into place.
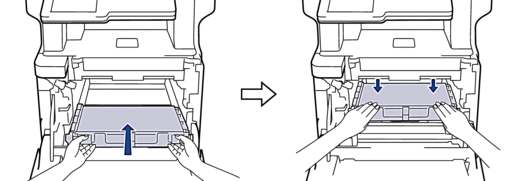
- Slide the belt unit back into the machine. Make sure the belt unit is level and fits firmly into place.
- NOTE
- To avoid print quality problems, DO NOT touch the shaded parts shown in the illustrations.

- Make sure the green lock lever (1) is in the release position, as shown in the illustration.
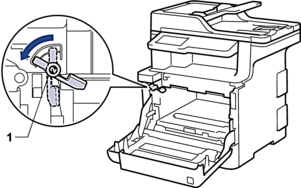
- Gently slide the drum unit into the machine until it stops at the green lock lever.
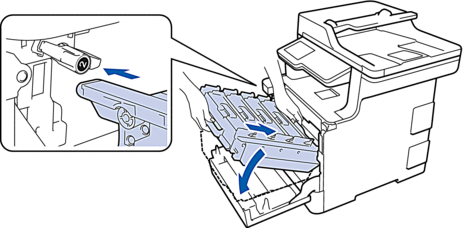
- Turn the green lock lever clockwise to the lock position.
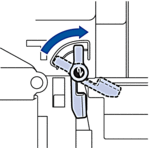
- Using the green handle, push the drum unit back into the machine until it locks in place.
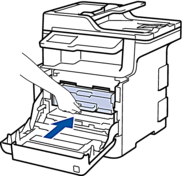
- Close the machine's front cover.
Remarques sur le contenu
Pour nous aider à améliorer notre soutien, veuillez nous faire part de vos commentaires ci-dessous.
