MFC-J200
Perguntas frequentes e Solução de problemas |
Paper Jam
Follow the steps below to clear the error message Paper Jam.
For the models with FAX functions:
Before you unplug the machine from the power source, you can transfer your faxes that are stored in the memory to your PC or another fax machine so you will not lose any important messages. Click here to see how to forward a fax to another fax machine.
NOTE: Illustrations shown below are from a representative product, and may differ from your Brother machine.
-
Desconecte o aparelho da tomada elétrica CA.
-
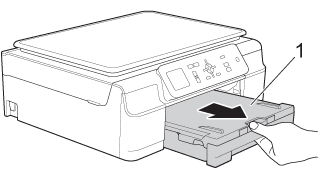
Se a aba de suporte de papel estiver aberta, feche-a e depois feche o suporte do papel. Puxe a bandeja de papel 1 completamente para fora do aparelho.
-
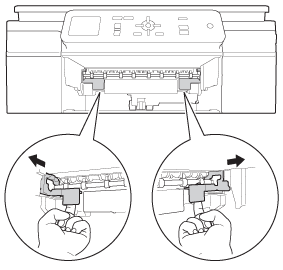
Pull the two green levers inside the machine to release the jammed paper.
-
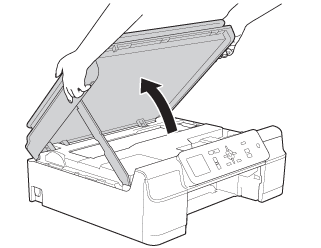
Usando ambas as mãos, use os pegadores em cada lado do aparelho para levantar a tampa do scanner para a posição aberta.
-
Puxe a bandeja de papel 1 completamente para fora do aparelho.
-
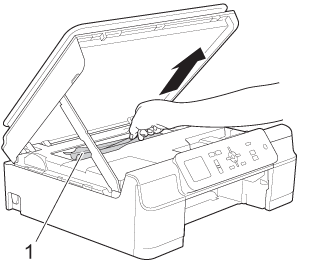
Move the print head and remove any pieces of paper remaining under the print head.
Unplug the machine from the power source before you move the print head using your hand.
-
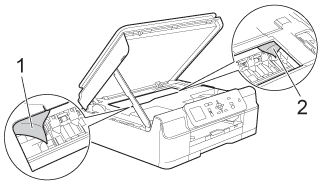
Carefully check the left (1) and right (2) side corners and remove any pieces of paper.
-
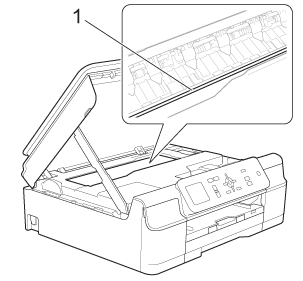
DO NOT touch the encoder strip (1). Isso pode causar danos ao aparelho.
-
If the print head is at the right corner as shown in the illustration (2), you cannot move the print head using your hand. Plug the power cord back into the AC power outlet (electrical socket). Hold down
 (Cancel) (for Touchscreen models) or Stop/Exit until the print head moves to the middle so that the right hand corner can be checked.
Hold the concave areas with the triangle marks as shown in the illustration (3) to move the print head.
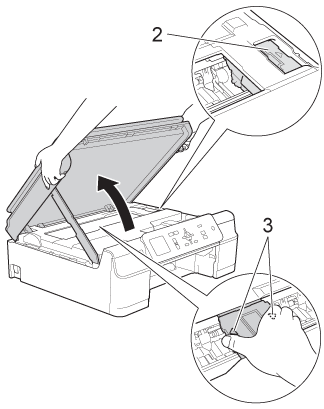
- Se a tinta manchar sua pele ou roupas, lave imediatamente com sabão ou detergente.
-
DO NOT touch the encoder strip (1). Isso pode causar danos ao aparelho.
-
Make sure you look carefully inside (1) for any pieces of paper.
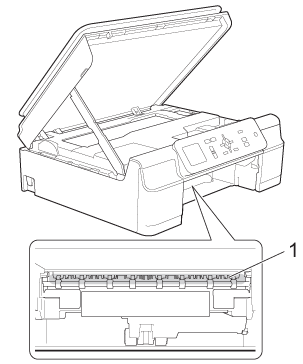
-
Look inside the machine from a lower angle, for any pieces of paper.
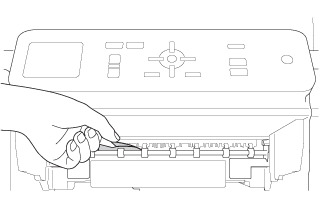
-
Abra a tampa de liberação de obstrução 1 na parte traseira do aparelho.

-
Puxe a bandeja de papel 1 completamente para fora do aparelho.
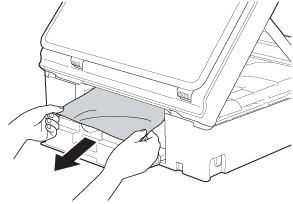
-
Feche a tampa de liberação de obstrução. Assegure-se de que a tampa esteja completamente fechada.
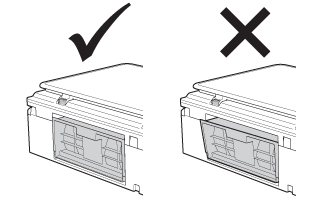
-
Coloque a bandeja de papel firmemente de volta no aparelho.
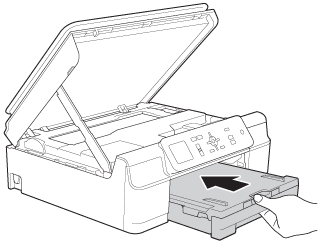
-
Levante a tampa do scanner (1) para liberar a trava. Empurre gentilmente o suporte da tampa do scanner para baixo (2) e feche a tampa do scanner (3) usando ambas as mãos.
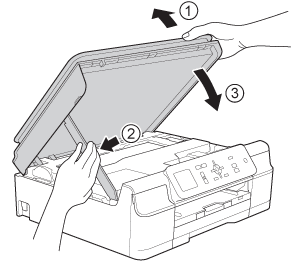
-
Enquanto segura a bandeja de papel no lugar, puxe para fora o suporte de papela até ouvir um clique e então desdobre a aba de suporte de papelb.
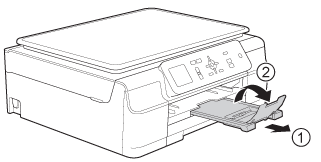
DO NOT use the paper support flap for Legal size paper. (Only available for some countries.)
-
Plug the power cord back into the AC power outlet (electrical socket).
- Verify the error message is cleared.
If the error message continues to appear, click here to see information for the error message "Paper Jam" after removing the jammed paper.
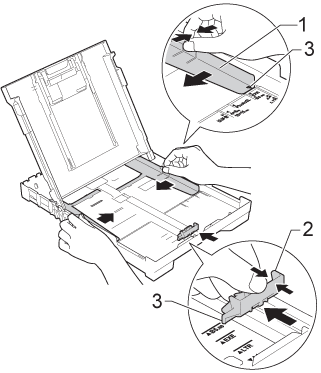
To avoid future paper jams, adjust the paper width guides (1) and paper length guide (2) to fit the paper size.
Make sure that the triangular marks (3) on the paper width guides (1) and paper length guide (2) line up with the marks for the paper size you are using.
