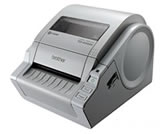
TD-4100N
Perguntas frequentes e Solução de problemas |
How do I install/change the RD roll?
Follow the steps below:
-
Press and hold the ON/OFF button
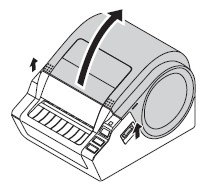
 to turn the printer off. Pull up the levers on both sides under the RD Roll compartment cover to open it.
-
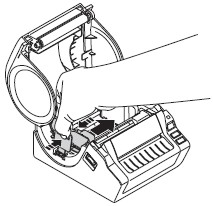
Squeeze the green lever and adjust the guide to fit the width of the RD roll. Use the scale molded in the rear compartment to assist positioning this guide.
-
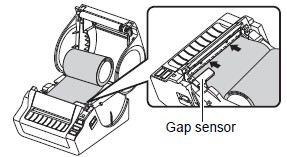
Slide the end of the RD roll under the gap (media) sensor.
If the end of the RD roll has not been fed under the gap (media) sensor, the printer may not be able to detect the media properly.
-
Insert a RD roll into the roll compartment upside down with the labels feeding from the bottom as shown. Check the position of the roll guide and adjust it to prevent the RD roll from moving sideways.
Incorrect insertion of the RD roll will not print on the correct side of the label.
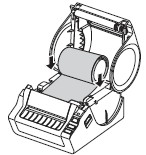
-
Position the end of the RD roll to touch the black plastic cutter guard.
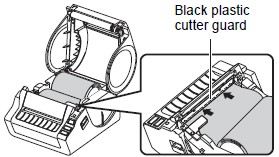
-
Close the RD Roll compartment cover.
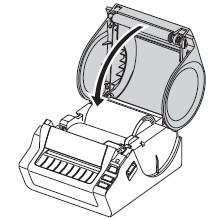
-
Press and hold the ON/OFF button
 to turn the printer on.
 -
Die cut label
Press the Feed button. The printer will position the label to the correct starting position. You are now ready to print.Continuous length label
Press the Feed button twice and the Cut button. The printer will position the label to the correct starting position. You are now ready to print.
Se você precisar de assistência adicional, entre em contato com o atendimento ao cliente da Brother:
Comentários sobre o conteúdo
Para ajudar-nos a melhorar nosso suporte, forneça seus comentários abaixo.
