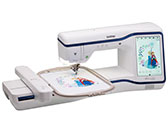
Innov-is XE1
ЧЗВ и отстраняване на неизправности |
How do I attach or remove the Embroidery Unit?
Attaching the Embroidery Unit
- Before attaching or removing the embroidery unit, be sure to turn off the machine. Otherwise, injuries may occur if one of the operation buttons is accidentally pressed.
- Do not move the machine with the embroidery unit attached. The embroidery unit could fall off and cause injury.
- Keep your hands and foreign objects away from the embroidery carriage and frame when the machine is embroidering. Otherwise, injuries or damage may result.
- To avoid distorting your embroidery design, do not touch the embroidery carriage and frame when the machine is embroidering.
- Do not push on the carriage when installing the embroidery unit onto the machine. Moving the carriage may damage the embroidery unit.
- Allow sufficient space around the embroidery unit. Otherwise, the embroidery unit could fall off foreign object, and may cause injury.
- Do not touch the embroidery carriage until the initialization finishes.
- Be sure to turn off the power before attaching or removing the embroidery unit. Otherwise, the machine may be damaged.
- Do not touch the inner connector of the embroidery unit. The pins on the embroidery unit connection may be damaged.
- Do not apply strong force to the embroidery unit carriage or pick up the unit by the carriage. Otherwise, the embroidery unit may be damaged.
- Store the embroidery unit in a safe place to prevent damage to the unit.
- Do not carry the embroidery unit by holding the carriage or release lever compartment.
-
Turn the main power to OFF.
-
Insert the embroidery unit connection into the machine connection port. Push lightly on the connection port cover until the unit clicks into place.

(1) Embroidery unit connection
(2) Machine connection port(3) Carriage
Be sure there is no gap between the embroidery unit and the machine. If there is a gap, the embroidery patterns will not embroider with the correct registration.
-
Turn the main power to ON.

>> The following message will appear.
-
Press [OK] .
>> The carriage will move to the initialization position.
Removing the Embroidery Unit
-
Press
 , then press
  .
.
>> The carriage will move to the removal position.Always remove the embroidery frame before pressing
. Otherwise, the frame may strike the embroidery foot, and possibly cause injury.
-
Turn the main power to OFF.
-
Squeeze the release lever, and pull the embroidery unit away from the machine.

Обратна връзка за съдържанието
За да ни помогнете да подобрим нашата поддръжка, моля, оставете вашата обратна връзка по-долу.