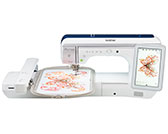
Innov-is XP1
FAQ et Diagnostic
How do I attach or remove the embroidery frame ?
Wind and insert the bobbin before attaching the embroidery frame.
Attaching the Embroidery Frame
Press the Presser Foot Lifter button to raise the presser foot.
Align the embroidery frame guide with the right edge of the embroidery frame holder.
(1) Embroidery frame holder
Slide the embroidery frame into the holder,
(1) Arrow mark
Lower the frame-securing lever to be level with the frame to secure the embroidery frame in the embroidery frame holder.
(1) Frame-securing lever
If the frame-securing lever is not lowered, the message Make sure embroidery frame is moved as far back as possible. LOCK DOWN THE FRAME-SECURING LEVER. appears. You cannot start embroidering until you lower the framesecuring lever.
Removing the Embroidery Frame
Press the Presser Foot Lifter button to raise the presser foot.
Raise the frame-securing lever.
Pull the embroidery frame toward you.
Si vous n'avez pas obtenu de réponse satisfaisante à votre question, avez-vous vérifié d'autres FAQ?
Avez-vous consulté les manuels?
Pour toute assistance supplémentaire, contactez le service clientèle de Brother:
Commentaires sur le contenu
Merci d'indiquer vos commentaires ci-dessous. Ils nous aideront à améliorer notre support.
Préparatifs Couture (Points de couture courants) Couture (Points caractères décoratifs) Broderie Fonctionnement Fonction capteur Fonction de numérisation Accessoires Maintenance Conseil ponctuel Informations générales Autres Paramètres réseau Ma Connexion Couture (Points de couture courants) Couture (Points caractères décoratifs) Broderie Préparation Fonctionnement Logiciel Messages d'erreur Problème général Paramètres réseau Vidéos d'instructions My Stitch Monitor My Design Snap Artspira
Introduction / Conseils pratiques (FAQ avec vidéos) Réglages Ma Connexion Messages d'erreur Question générale Dépannage Enfilage supérieur Canette (Bobinage/installation de la canette) Pied-de-biche Aiguille/Fil/Tissu Avant de broder Comment procéder (FAQ avec vidéos) Autres Pied-de-biche Aiguille/Fil/Tissu Conseils de couture Pédale Comment procéder (FAQ avec vidéos) Autres Aiguille/Fil/Tissu Conseils de couture Motifs de broderie Aiguille/Fil Tissu/Renfort Cadre de broderie Modification de la broderie Conseils de broderie Comment procéder (FAQ avec vidéos) Fonctionnement de base Fonction de mémoire Réglages de la machine Comment procéder (FAQ avec vidéos) Autres Fonction de caméra Conseils de numérisation Accessoires Comment procéder (FAQ avec vidéos) Nettoyage Huilage Message de maintenance Entretien et maintenance (FAQ avec vidéos) Consommables Conseil ponctuel Informations générales Conseils pour les paramètres réseau Autres Problèmes pendant la couture Résultat de couture Pédale Problèmes pendant la couture Résultat de couture Problèmes pendant la broderie Résultat de broderie Sélection et modification des motifs Données de broderie Canette (Bobinage/installation de la canette) Fonction de mémoire Réglages de la machine Layout & Editing Données de broderie Message d'erreur sur l'affichage de la machine Problème général Paramètres de réseau sans fil Préparatifs (vidéo) Fonctionnement (vidéo) Couture (vidéo) Broderie (vidéo) Pieds en option (vidéo) Accessoires pour machines à coudre (vidéo) Entretien et maintenance (vidéo) Question générale Vidéos d'instructions Conseils pratiques Dépannage Messages d'erreur Question générale Vidéos d'instructions Conseils pratiques Dépannage Messages d'erreur


 with the holder’s
  .
.