QL-1050
FAQ & Fehlerbehebung |
How to use the "Auto Format" function.
To use the "Auto Format" function,
-
Click the "Auto Format" button to open the "Auto Format" dialog box.

-
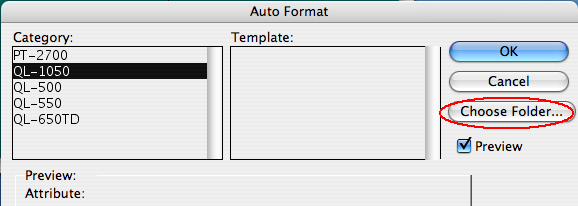
In the "Category" list box, select your P-touch or QL machine.
-
Click the "Choose Folder..." button to open the "Choose a folder" dialog box.
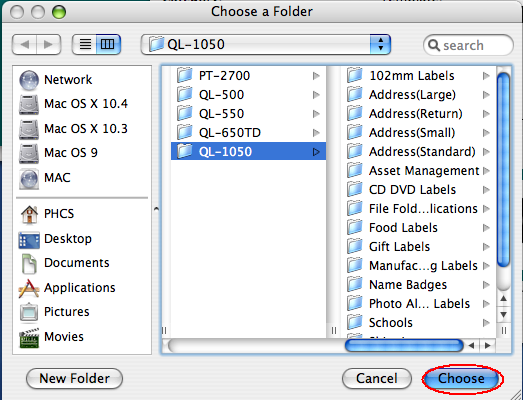
- Click the "Choose" button.
-
The Category list and Template list will appear in the "Auto Format" dialog box.
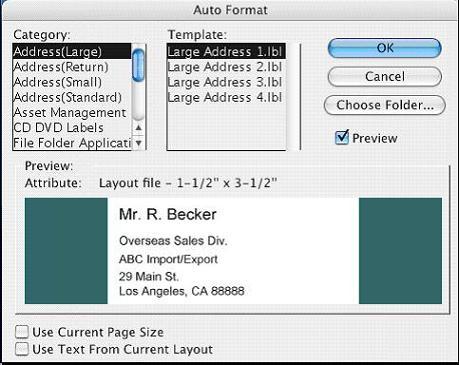
The templates displayed will depend on the type of your machine.
- In the "Category" list box, choose the category containing the template that you wish to use.
-
In the "Template" list box, choose the desired template and then click the "OK" button.
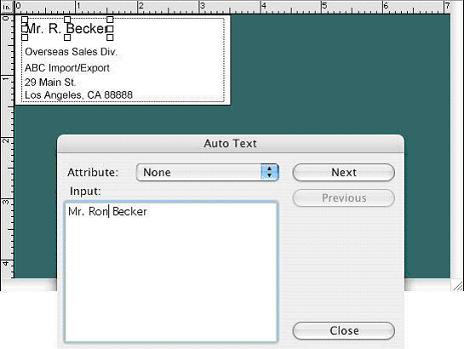
- A new layout containing the pre-formatted text is created and the "Auto Text" dialog box is displayed.
- Click the "Next" button until the text that you wish to change is displayed in the "Input:" edit box.
- Click inside the "Input:" edit box to place the cursor in the box, and then change the text.
- Click the "Next" button to display the next line of text in the "Input:" edit box.
- Repeat steps 8 to 9 until you have finished making your change.
- Click the "Close" button to add the new text to the layout in the print area.
Rückmeldung zum Inhalt
Helfen Sie uns dabei, unseren Support zu verbessern und geben Sie uns unten Ihre Rückmeldung.
