
CAUTION
| |
While removing the drum unit, handle it carefully because it may contain toner.
|
| |
Every time you replace the drum unit, clean the inside of the printer. See
Cleaning. |
When you replace the drum unit with a new one, you need to reset the drum counter by completing the following steps:
| 1 |
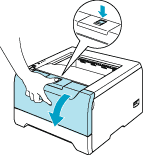
Make sure that the printer is turned on and the Drum LED is blinking. Press the front cover release button and then open the front cover.
|
| 2 |
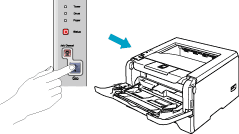
Press and hold down Go for about 4 seconds until all the LEDs light up. Once all four LEDs are lit, release Go.
  Improper Setup
| |
Do not reset the drum counter when you only replace the toner cartridge.
|
|
| 3 |
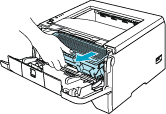
Take out the drum unit and toner cartridge assembly.
  CAUTION
| |
We recommend that you put the drum unit and toner cartridge assembly on a piece of disposable paper or cloth in case you accidentally spill or scatter toner.
|
| |
To prevent damage to the printer from static electricity, DO NOT touch the electrodes shown in the illustration.
|
|


