

  |
  |
| 3 |
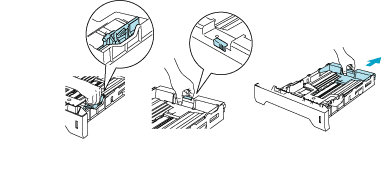
While pressing the blue paper-guide release lever, slide the paper guides to fit the paper size. Make sure that the guides are firmly in the slots. For legal size paper*1, press in the paper-guide release lever and pull out the back of the paper tray.

|
||
| 4 |
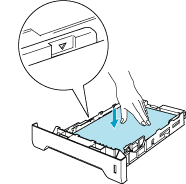
Put paper in the tray, and below the maximum paper mark (

|
||
| 5 |
Put the paper tray firmly back in the printer. Make sure that it is completely inserted into the printer.
|
||
| 6 |
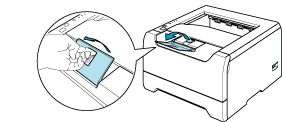
Lift up the support flap to prevent paper from sliding off the face-down output tray, or remove each page as soon as it comes out of the printer.

|
||
| 7 |
Send the print data to the printer.
|
| • |
The side to be printed on must be face down.
|
| • |
When printing on transparencies, remove each transparency at once after printing. Stacking the printed transparencies may cause a paper jam or the transparency to curl.
|
  |
  |