| | |
| 1 | Make sure that the power cord is plugged in. | ||||||||||||||||||||||||||||||
| 2 | Turn on your printer and wait until the printer is in the Ready state. | ||||||||||||||||||||||||||||||
| 3 | Turn on your computer. (You must be logged on with Administrator rights.) Close any applications running before configuration. | ||||||||||||||||||||||||||||||
| 4 | Put the supplied CD-ROM into your CD-ROM drive. The opening screen will appear automatically. Select your printer and the language. | ||||||||||||||||||||||||||||||
| 5 | Click Install Printer Driver.  | ||||||||||||||||||||||||||||||
| 6 | Click Wireless Network users. 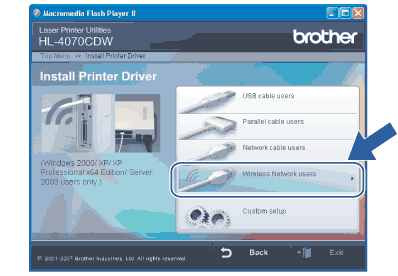 | ||||||||||||||||||||||||||||||
| 7 | Choose Wireless Setup and Driver Install or Wireless Setup Only, and then click Next. 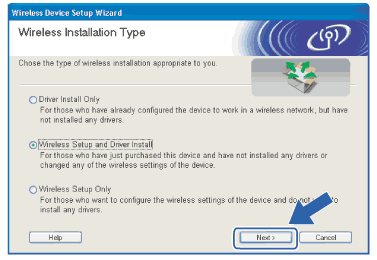 | ||||||||||||||||||||||||||||||
| 8 | Read the Important Notice and check the box after you confirm this setting, and then click Next. 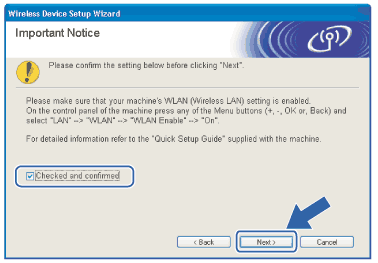 | ||||||||||||||||||||||||||||||
| 9 | Choose I’d like to use the SecureEasySetup™ function of my access point to configure my wireless device. and click Next. 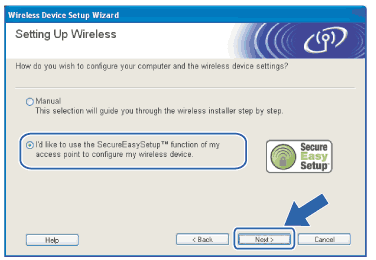 | ||||||||||||||||||||||||||||||
| 10 | Confirm the on-screen message and click Next. 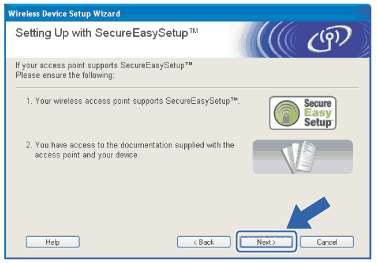 | ||||||||||||||||||||||||||||||
| 11 | Refer to the instruction manual that came with your access point to use the SecureEasySetup™ mode of your access point. | ||||||||||||||||||||||||||||||
| 12 | Put the printer in SecureEasySetup™ mode using the control panel.
| ||||||||||||||||||||||||||||||
| 13 | Click Next or Finish. 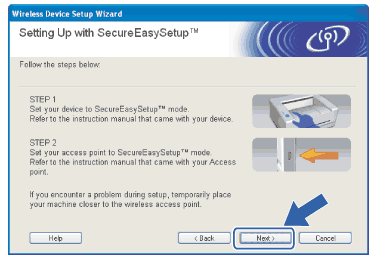
| ||||||||||||||||||||||||||||||
| 14 | Check the box after you confirm that you have completed the wireless settings, and then click Next. 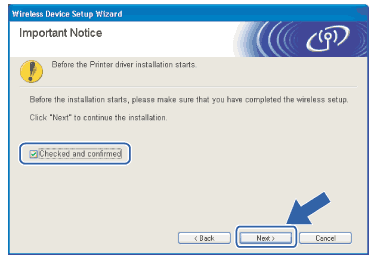 |
| | |