| | |


| 1 | The driver installation starts. When the License Agreement window appears, click Yes if you agree to the License Agreement. |
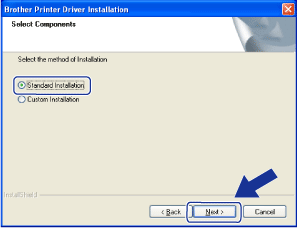
| 2 | Choose Standard Installation, and then click Next. |
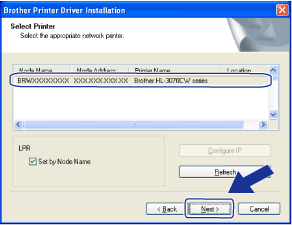
| 3 | Choose Search the network for devices and choose from a list of discovered devices (Recommended). Or enter your printer's IP address or its node name. Click Next. You can find your printer’s IP address and the node name by printing out the Network Configuration page. See Printing the Network Configuration page. |
| 4 | Choose your printer, and then click Next. If your printer takes a long time to appear on the list, 1 minute or more, then click Refresh. If your printer still fails to appear, reset the print server back to its factory default settings (see Reset the network settings to the factory default) and try the wireless setup again. |
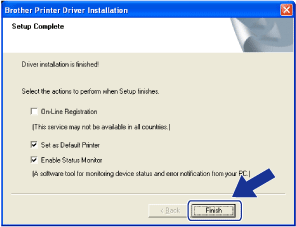
| 5 | Click Finish. |
| | |