Printing images

1
Make sure that your camera is turned off. Connect your camera to the USB direct interface (1) on the front of the machine using a suitable USB cable.
Graphic
2
Turn on the camera. Make sure your camera is in PictBridge mode.
When the machine has recognized the camera, the LCD shows the following message depending on which mode the machine is in:
 
2008/01/09 09:03
 
Fax Only
Camera Connected
Bsymbol.utriScan to FTP
   Scan to E-mail
   Scan to Image
Bsymbol.dtriScan to OCR
Camera Connected
Contrast   :-Bsymbol.squBsymbol.squBsymbol.squfBsymbol.squBsymbol.squ+
Quality     :Auto
Enlg/Red :100%
Tray        :MP>T1
Camera Connected
3
Set your camera to print an image. Set the number of copies if you are asked.
When the machine starts printing an image, the LCD will show the following message:
PictBridge


Printing. Keep...
Note Note
 
Please refer to the documentation supplied with your camera for detailed operations how to print using PictBridge.
CAUTION CAUTION
 
To prevent damage to your machine, DO NOT connect any device other than a digital camera or USB flash memory drive to the USB direct interface.
 
DO NOT remove the digital camera from the USB direct interface until the machine has finished printing.

DPOF printing

DPOF stands for Digital Print Order Format.
Major digital camera manufacturers (Canon Inc., Eastman Kodak Company, Fuji Photo Film Co. Ltd., Matsushita Electric Industrial Co. Ltd. and Sony Corporation) created this standard to make it easier to print images from a digital camera.
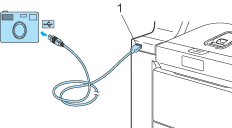
If your digital camera supports DPOF printing, you will be able to choose on the digital camera display the images and number of copies you want to print.
The following DPOF settings are available.
• 
1 in 1 printing
• 
Copies