If you have print quality problems, clean the corona wires as follows:
1
Turn off the machine’s power switch.
Unplug the telephone line cord first, and then unplug the power cord from the electrical socket.
2
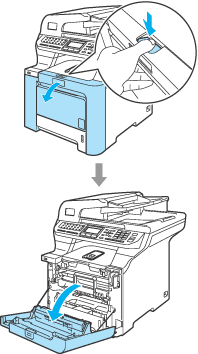
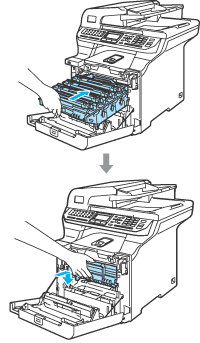
Press the front cover release button and then open the front cover.
3
Hold the green handle of the drum unit. Lift the drum unit up and then pull it out until it stops.
4
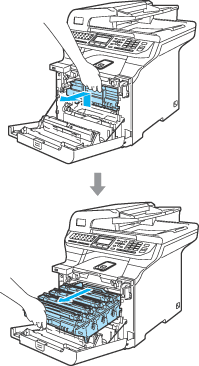
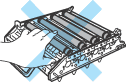
Using their colored handles to lift them out, remove all four toner cartridges from the drum unit.
CAUTION
We recommend that you place the toner cartridges on a clean, flat surface with a piece of disposable paper underneath it in case you accidentally spill or scatter toner.
DO NOT put a toner cartridges into a fire. It could explode, resulting in injuries.
Handle the toner cartridges carefully. If toner scatters on your hands or clothes, wipe or wash it off with cold water at once.
To avoid print quality problems, DO NOT touch the shaded roller parts shown in the illustrations.
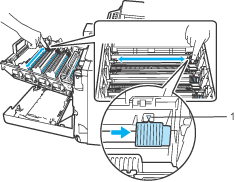
5
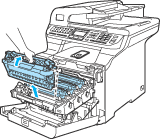
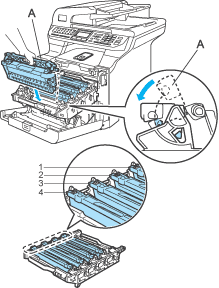
Unclip and fold back the white corona wire cover (1).
Note
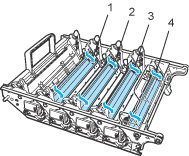
We recommended that you clean the corona wire for each of the colors. If you want to clean only the corona wire of the color that caused the print quality problem, see the illustration below to identify the position of each of the corona wires.
1.
Corona wire cover for Black (K)
2.
Corona wire cover for Yellow (Y)
3.
Corona wire cover for Magenta (M)
4.
Corona wire cover for Cyan (C)
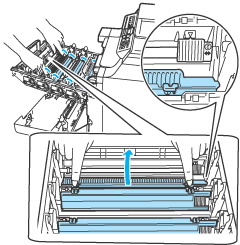
6
Clean the corona wire inside the drum unit by gently sliding the green tab from left to right and right to left several times.
CAUTION
•
Be sure to return the tab to the home position () (1). If you do not, printed pages may have a vertical stripe.
•
Do not touch the drum surface.
7
Close the corona wire cover.
8
Repeat 5 to 7 to clean each of the remaining corona wires. There are four corona wires in total.
9
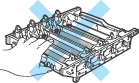
Holding the toner cartridges by their colored handles, insert them one by one back into the drum unit as shown. Make sure that you match the toner cartridge color to the same color label on the drum unit, and make sure that you fold down the toner cartridge handle (A) once the toner cartridge is in place. Repeat this for all the toner cartridges.
1.
C - Cyan
2.
M - Magenta
3.
Y - Yellow
4.
K - Black
10
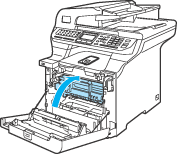
Push the drum unit in until it stops.
11
Close the front cover of the machine.
12
Plug the machine’s power cord back into the AC electrical socket first, and reconnect all cables and telephone line cord. Turn on the machine’s power switch.