For Windows
®
7 users
1
Click the
button,
Control Panel
,
System and Security
and then
Windows Firewall
.
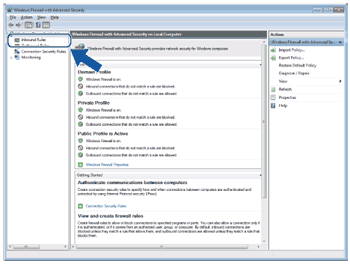
Make sure the
Windows Firewall state
is set to
On
.
2
Click
Advanced settings
. The
Windows Firewall with Advanced Security
window appears.
3
Click the
Inbound Rules
.
4
Click the
New Rule
.
5
Choose
Port
and click
Next
.
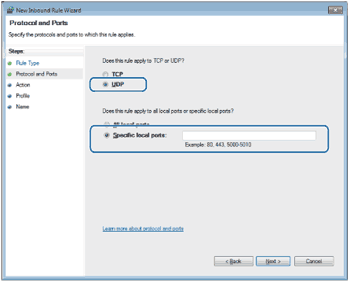
6
To add port enter the information below:
•
For network scanning
Choose
UDP
and enter “
54925
” in the
Specific local ports
.
Click
Next
.
•
For Network PC-Fax
Choose
UDP
and enter “
54926
” in the
Specific local ports
.
Click
Next
.
7
Choose
Allow the connection
and click
Next
.
8
Check the applicable items and click
Next
.
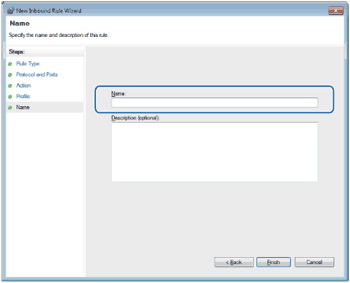
9
Enter any description in
Name:
(for example “Brother Scanner” or “Brother PC-Fax”) and click
Finish
.
10
Make sure that the new setting is added and is checked.
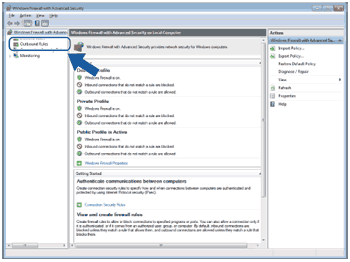
11
Click the
Outbound Rules
.
12
Click the
New Rule
.
13
Choose
Port
and click
Next
.
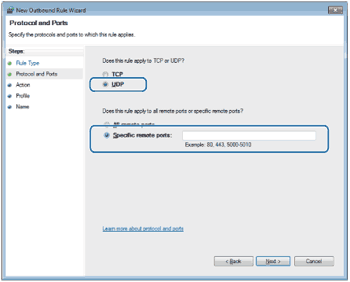
14
To add port enter the information below:
•
For network scanning
Choose
UDP
and enter “
54925
” in the
Specific remote ports
.
Click
Next
.
•
For Network PC-Fax
Choose
UDP
and enter “
54926
” in the
Specific remote ports
.
Click
Next
.
15
Choose
Allow the connection
and click
Next
.
16
Check the applicable items and click
Next
.
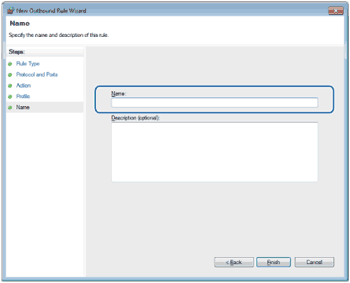
17
Enter any description in
Name:
(for example “Brother Scanner” or “Brother PC-Fax”) and click
Finish
.
18
Make sure that the new setting is added and is checked.
Page Top