| 1 | Press the front cover release button and then open the front cover. 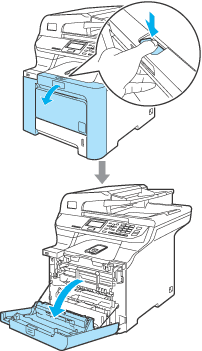 | |
| 2 | Close the front cover of the machine. The machine starts warming up, wait until it finishes warming up before going on to step 3. | |
| 3 | 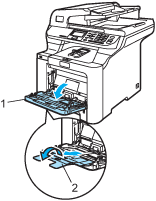 | |
| 4 | Put a blank sheet of A4 or Letter sized paper in the MP tray. 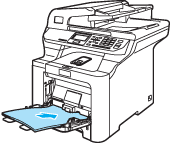 | |
| 5 | While pressing and holding down Clear/Back press 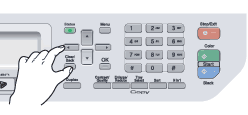 | |
| 6 | Press Black Start or Color Start. The paper will feed into the machine to start the drum cleaning. | |
| 7 | The following message appears on the LCD when the machine has finished cleaning.
| |
| 8 | Press Stop/Exit so that the machine returns to the Ready state. | |
| 9 | ||
| 10 | Turn off the machine’s power switch. Disconnect all cables, and then unplug the power cord from the AC power outlet. | |
| 11 | Press the front cover release button and then open the front cover.  | |
| 12 | Hold the green handle of the drum unit. Lift the drum unit up and then pull it out until it stops. 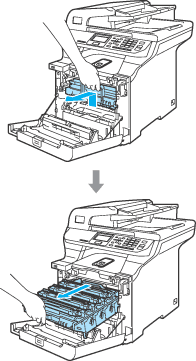 | |
| 13 | Release the gray lock lever (1) that is on the left side of the machine. Lift the front of the drum unit and pull the drum unit completely out of the machine using the green handles on the drum unit. 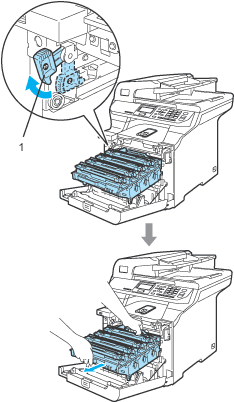 | |
| 14 | Hold the handle of the toner cartridge and pull it out of the drum unit. Repeat this for all of the toner cartridges. 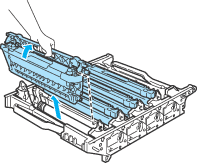 | |
| 15 | Turn the drum unit over by holding the green handles. Make sure that the drum unit gears (1) are on the left hand side. 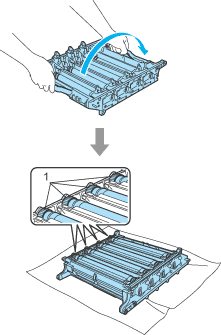 | |
| 16 | See the print sample to identify the color causing the problem. The color of the spots or toner stain is the color of the drum you should clean. For example, if the spots are cyan, you should clean the drum for cyan. Put the print sample in front of the drum, and the find the exact position of the poor print. 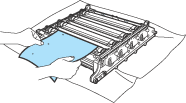 | |
| 17 | Turn the drum unit gear toward you by hand while looking at the surface of the drum (1). 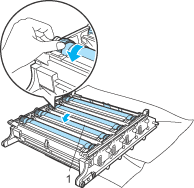 | |
| 18 | When you have found the mark on the drum that matches the print sample, wipe the surface of the drum gently with a cotton swab until the dust or paper powder on the surface comes off. 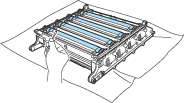 | |
| 19 | Turn the drum unit gear toward you by hand to return it to the home position. The home position of each drum can be identified by matching the number on the drum unit gear to the same number on the side of the drum unit as shown in the illustration. Make sure that the number on each of the four drum unit gears matches the corresponding number on the side of the drum unit. 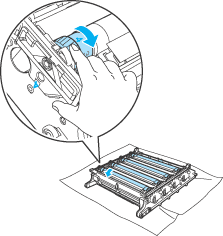 | |
| 20 | Hold the handle of the toner cartridge and slide the toner cartridge into the drum unit. Make sure that you match the toner cartridge color to the same color label on the drum unit, and make sure that you fold down the toner cartridge handle (A) once the toner cartridge is in place. Repeat this for all the toner cartridges. 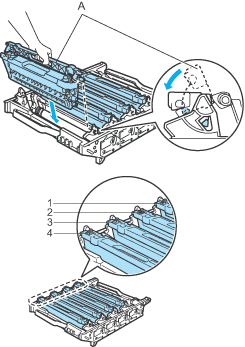 | |
| 21 | Put the drum unit back in the machine as follows. | |
| 22 | Close the front cover of the machine. 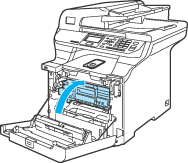 | |
| 23 | Plug the machine’s power cord back into the AC power outlet first, and reconnect all cables.Turn on the machine’s power switch. |