DO NOT use isopropyl alcohol to clean the laser scanner windows.
DO NOT touch the laser scanner windows with your fingers.
1
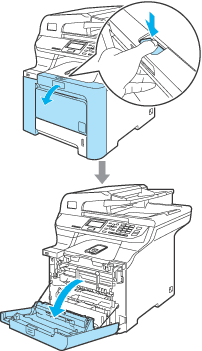
Turn off the machine’s power switch.
Disconnect all cables, and then unplug the power cord from the AC power outlet.
2
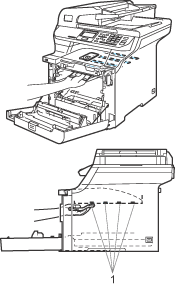
Press the front cover release button and then open the front cover.
3
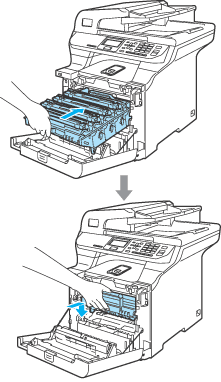
Hold the green handle of the drum unit. Lift the drum unit up and then pull it out until it stops.
4
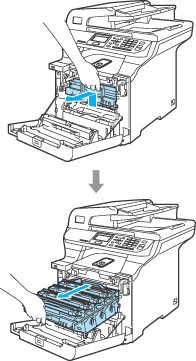
Release the gray lock lever (1) that is on the left side of the machine. Lift the front of the drum unit and pull the drum unit completely out of the machine using the green handles on the drum unit.
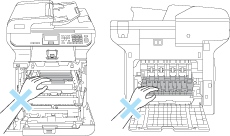
HOT SURFACE
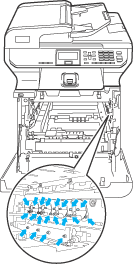
After you have just used the machine, some internal parts of the machine will be extremely hot. When you open the front cover of the machine, DO NOT touch the shaded parts shown in the illustration.
CAUTION
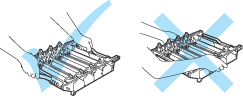
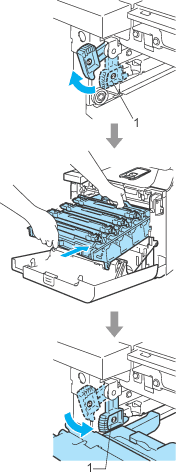
Hold the handles of drum unit when you carry it. DO NOT hold the sides of the drum unit.
We recommend that you place the drum unit on a clean, flat surface with a piece of disposable paper underneath it in case you accidentally spill or scatter toner.
To prevent damage to the machine from static electricity, DO NOT touch the electrodes shown in the illustration.
5
Wipe the scanner windows (1) with a dry, lint-free cloth.
6
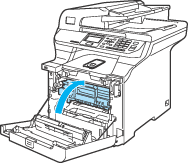
Put the drum unit back in the machine as follows.
(1)
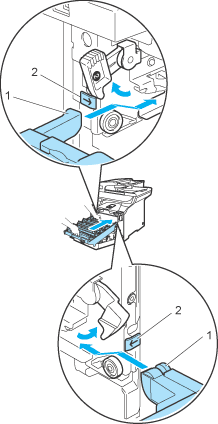
Make sure that the gray lock lever (1) is in the up position and put the drum unit in the machine. Push down the gray lock lever (1).
Note
When you put the drum unit in the machine, match the green guides (1) of the drum unit handle to the green arrows (2) on both sides of the machine.
(2)
Push the drum unit in until it stops.
7
Close the front cover of the machine.
8
Plug the machine’s power cord back into the AC power outlet first, and reconnect all cables.Turn on the machine’s power switch.