Paper jams

To clear paper jams, please follow the steps in this section.
CAUTION IMPORTANT
Please confirm that you have installed both a toner cartridge and a drum unit in the machine. If you have not installed a drum unit or have installed the drum unit incorrectly, then this may cause a paper jam in your Brother machine.
To prevent damage to the machine caused by static electricity, DO NOT touch the electrodes shown in the illustration.
Graphic
Note Note
If the error message remains, open and close the front cover and fuser cover firmly to reset the machine.
The LCD names for the paper trays are as follows:
Standard paper tray: Tray 1
Multi-purpose tray: MP Tray

Paper is jammed in the MP tray

If the LCD shows Jam MP Tray, follow these steps:
1
Remove the paper from the MP tray.
2
Remove any jammed paper from in and around the MP tray.
Graphic
3
Press Start.
4
Fan the paper stack, and then put it back in the MP tray.
Graphic
5
When loading paper in the MP tray, make sure that the paper stays under the maximum paper height guides on both sides of the tray.
Graphic

Paper is jammed in Paper Tray 1

If the LCD shows Jam Tray 1, follow these steps:
1
Pull the paper tray completely out of the machine.
Graphic
2
Use both hands to slowly pull out the jammed paper.
Graphic
3
Make sure the paper is below the maximum paper mark (Bsymbol.dtri) of the paper tray. While pressing the blue paper-guide release lever, slide the paper guides to fit the paper size. Make sure that the guides are firmly in the slots.
4
Put the paper tray firmly back in the machine.

Paper is jammed inside the machine

1
Turn off the machine‘s power switch. Disconnect all cables and then unplug the power cord from the electrical socket.
2
Pull the paper tray completely out of the machine.
3
Use both hands to slowly pull out the jammed paper.
Graphic
4
Press the front cover release button and open the front cover.
Graphic
CAUTION CAUTION
GraphicHOT SURFACE
After you have just used the machine, some internal parts of the machine will be extremely hot. Wait at least 10 minutes for the machine to cool down before attempting to clear the paper jam.
5
Slowly take out the drum unit and toner cartridge assembly. The jammed paper may be pulled out with the drum unit and toner cartridge assembly, or this may release the paper so you can pull it out of the paper tray opening.
Graphic
CAUTION IMPORTANT
We recommend that you place the drum unit and toner cartridge assembly on a clean, flat surface with a sheet of disposable paper or cloth underneath it in case you accidentally spill or scatter toner.
To prevent damage to the machine from static electricity, DO NOT touch the electrodes shown in the illustration.
Graphic
6
Put the drum unit and toner cartridge assembly back in the machine.
Graphic
7
Close the front cover.
8
Put the paper tray firmly back in the machine.
9
Plug the machine‘s power cord back into the electrical socket first, and reconnect all cables. Turn on the machine‘s power switch.

Paper is jammed inside the drum unit and toner cartridge assembly

1
Turn off the machine‘s power switch. Disconnect all cables and then unplug the power cord from the electrical socket.
2
Press the front cover release button and open the front cover.
Graphic
CAUTION CAUTION
GraphicHOT SURFACE
After you have just used the machine, some internal parts of the machine will be extremely hot. Wait at least 10 minutes for the machine to cool down before attempting to clear the paper jam.
3
Slowly take out the drum unit and toner cartridge assembly.
Graphic
CAUTION IMPORTANT
We recommend that you place the drum unit and toner cartridge assembly on a clean, flat surface with a sheet of disposable paper or cloth underneath it in case you accidentally spill or scatter toner.
4
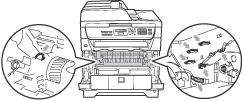
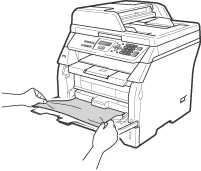
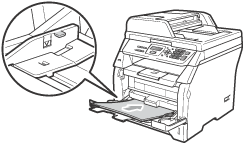
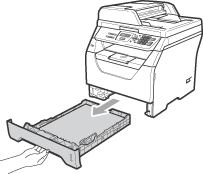
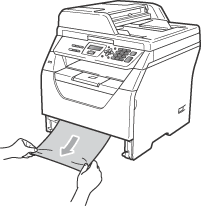
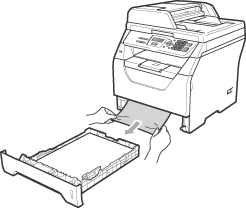
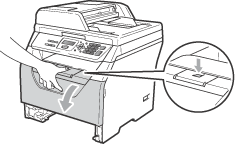
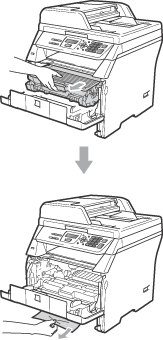
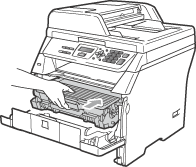
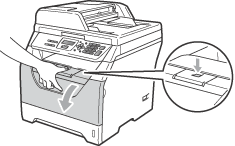
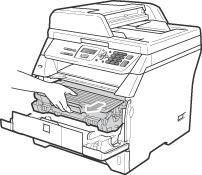
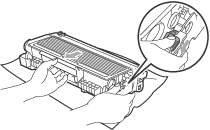
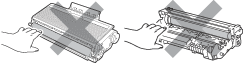
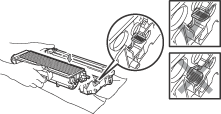
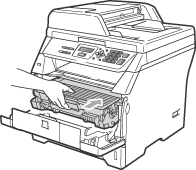
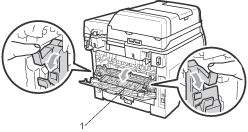
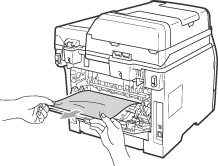
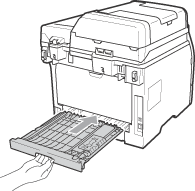
Push down the blue lock lever and take the toner cartridge out of the drum unit.
Take out the jammed paper if there is any inside the drum unit.
Graphic
CAUTION IMPORTANT
Handle the toner cartridge carefully. If toner scatters on your hands or clothes, wipe or wash it off with cold water at once.
To avoid print quality problems, DO NOT touch the shaded parts shown in the illustrations below.
Graphic
5
Clear the jammed paper if there is any inside the drum unit.
6
Put the toner cartridge back into the drum unit until you hear it lock into place. If you put it in correctly, the blue lock lever will lift automatically.
Graphic
7
Put the drum unit and toner cartridge assembly back in the machine.
Graphic
8
Close the front cover.
9
Plug the machine‘s power cord back into the electrical socket first, and reconnect all cables. Turn on the machine‘s power switch.

Paper is jammed at the back of the machine

1
Turn off the machine‘s power switch. Disconnect all cables and then unplug the power cord from the electrical socket.
2
Press the front cover release button and open the front cover.
Graphic
CAUTION CAUTION
GraphicHOT SURFACE
After you have just used the machine, some internal parts of the machine will be extremely hot. Wait at least 10 minutes for the machine to cool down before attempting to clear the paper jam.
3
Slowly take out the drum unit and toner cartridge assembly.
Graphic
CAUTION IMPORTANT
We recommend that you place the drum unit and toner cartridge assembly on a clean, flat surface with a sheet of disposable paper or cloth underneath it in case you accidentally spill or scatter toner.
4
Open the back cover (back output tray).
Graphic
5
Pull the tabs at the left and right hand sides toward you to open the fuser cover (1).
Graphic
6
Pull the jammed paper out of the fuser unit.
Graphic
7
Close the fuser cover and back cover (back output tray).
8
Put the drum unit and toner cartridge assembly back in the machine.
Graphic
9
Close the front cover.
10
Plug the machine‘s power cord back into the electrical socket first, and reconnect all cables. Turn on the machine‘s power switch.

Paper is jammed in the duplex tray

1
Pull the duplex tray completely out of the machine.
Graphic
2
Pull the jammed paper out of the machine or the duplex tray.
Graphic
3
Put the duplex tray back in the machine.
Graphic