


  |   |
| 1 | Open the ink cartridge cover. |
| 2 | Press the ink release lever to release the ink cartridge and take out all the ink cartridges. (See Replacing the ink cartridges.) |
| 3 | Install the green protective part and then close the ink cartridge cover. 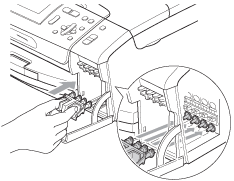 |
| 4 | Lift the front of the machine and hook the long end (1) of the green protective part into the T-shaped hole underneath the machine. Push the forked end (2) onto the top of the paper tray. 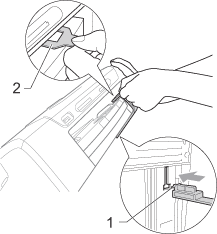 |
| 5 | Unplug the machine from the electrical socket. |
| 6 | Using both hands, use the plastic tabs on both sides of the machine to lift the scanner cover until it locks securely into the open position. Then unplug the interface cable from the machine, if it is connected. |
| 7 | Lift the scanner cover to release the lock ( 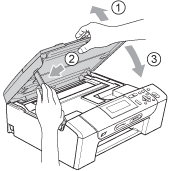 |
| 8 | Wrap the machine in the bag. 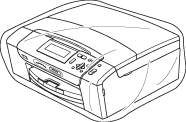 |
| 9 | Pack the machine and the printed materials in the original carton with the original packing material as shown below. Do not pack the used ink cartridges in the carton. 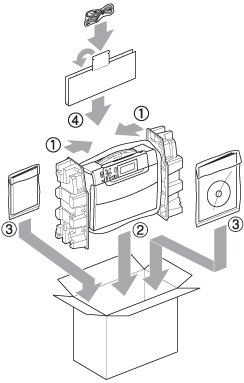 |
| 10 | Close the carton and tape it shut. |
  |   |