Customizing a user-defined button

To customize a button, right-click the button, then click the ControlCenter Configuration button to see the configuration window.

Scan to Image

General tab
To create the button name, enter a name in the Please enter a name for the Custom Button text field (up to 30 characters). Choose the type of scan from the Scan Action field.
Screen
Settings tab
Choose the Target Application, File Type, Resolution, Scan Type, Document Size, Show Scanner Interface, Brightness and Contrast settings.
Screen
If you choose Secure PDF from the File Type list, click the Graphic icon to open the Set PDF Password dialog box. Enter your password in the Password and Re-type Password box and then click OK. After the password is saved it will be automatically be saved with your document the next time you scan to a Secure PDF. If you want to change it, click the Graphic icon and set the new password.
Screen
Note Note
Secure PDF is also available for Scan to E-mail and Scan to File.

Scan to OCR

General tab
To create the button name, enter a name in the Please enter a name for the Custom Button text field (up to 30 characters).
Choose the type of scan from the Scan Action field.
Screen
Settings tab
Choose the Target Application, File Type, OCR Software, OCR Language, Resolution, Scan Type, Document Size, Show Scanner Interface, Brightness and Contrast settings.
Screen

Scan to E-mail

General tab
To create the button name, enter a name in the Please enter a name for the Custom Button text field (up to 30 characters).
Choose the type of scan from the Scan Action field.
Screen
Settings tab
Choose the E-mail Application, File Type, Resolution, Scan Type, Document Size, Show Scanner Interface, Brightness and Contrast settings.
Screen

Scan to File

General tab
To create the button name, enter a name in the Please enter a name for the Custom Button text field (up to 30 characters).
Choose the type of scan from the Scan Action field.
Screen
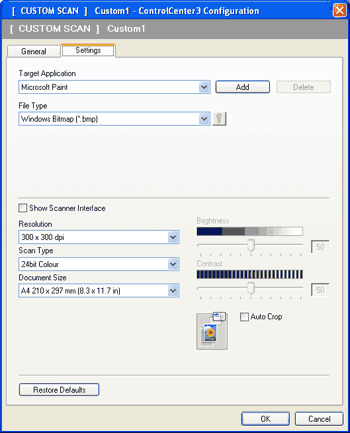
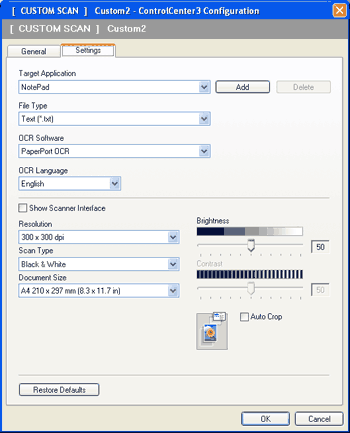
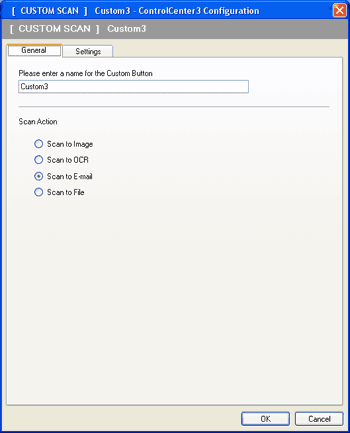
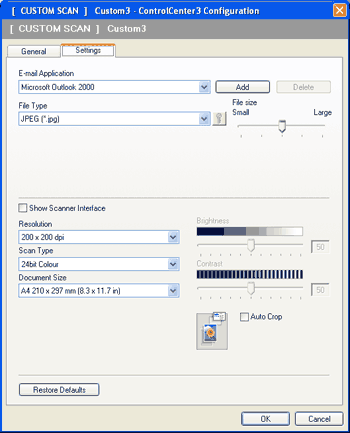
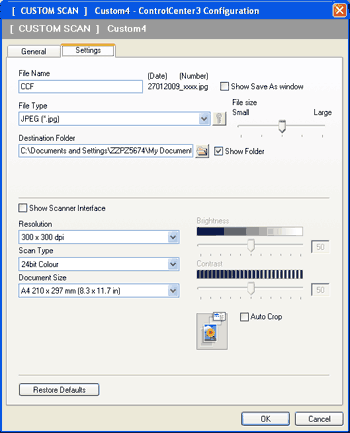
Settings tab
Choose the file format from the File Type drop-down list. Save the file to the default folder which is shown in the Destination Folder box or choose your preferred folder by clicking the Graphic icon. Check Show Folder to show where the scanned image is saved after scanning. Check Show Save As window to specify the destination of the scanned image after every scan.
Choose the Resolution, Scan Type, Document Size, Show Scanner Interface, Brightness and Contrast settings and enter the file name if you want to change it.
Screen