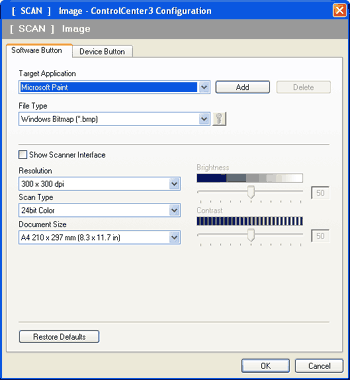
The Scan to Image feature lets you scan an image directly into your graphics application for image editing. To change the default settings, right-click the Image button, click ControlCenter Configuration and click the Software Button tab.
If you want to scan and then crop a portion of a page after pre-scanning the document, check the Show Scanner Interface box.
Change the other settings, if needed.
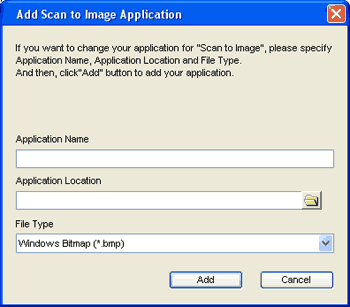
To change the destination application, choose the correct application from the Target Application drop-down list. You can add an application to the list by clicking the Add button.
Enter the
Application Name (up to 30 characters) and the
Application Location. You can also find the application location by clicking the

icon. Choose
File Type from the drop-down list.
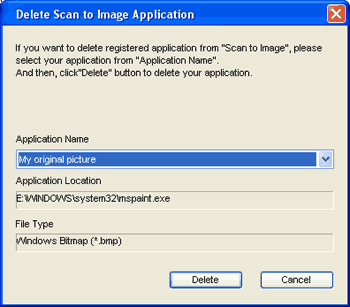
You can delete an application that you have added by clicking the Delete button in the Software Button tab.

Note
| | This function is also available for Scan to E-mail and Scan to OCR. The window may vary depending on the function. |
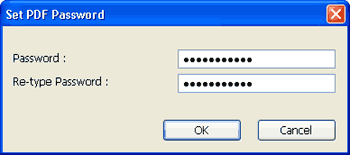
If you choose
Secure PDF from the
File Type list, click the

icon to open the
Set PDF Password dialog box. Enter your password in the
Password and
Re-type Password box and then click
OK. After the password is saved it will be automatically be saved with your document the next time you scan to a Secure PDF. If you want to change it, click the
icon and set the new password.
Note
| | Secure PDF is also available for Scan to E-mail and Scan to File. |