

  |   |
| • | Please use the latest version of the BRAdmin Professional 3 utility that is available as a download from http://solutions.brother.com/. This utility is only available for Windows® users. |
| • | If you are using a firewall function of anti-spyware or antivirus applications, temporarily disable them. Once you are sure that you can print, configure the software settings following the instructions. |
| • |
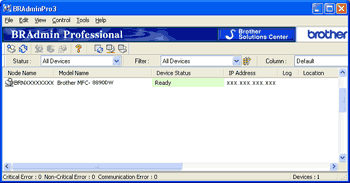
| 1 | Start the BRAdmin Professional utility (from Windows® 2000/XP, Windows Vista® and Windows Server® 2003/2008), by clicking Start / All Programs1 / Brother Administrator Utilities / Brother BRAdmin Professional 3 / BRAdmin Professional 3.  | ||||
| 2 | Choose the print server which you want to configure. | ||||
| 3 | Choose Configure Device from the Control menu. | ||||
| 4 | Enter a password if you have set one. The default password is “access”. | ||||
| 5 | You can now change the print server settings.
|
  |   |