Home > Network > Network Features > Fax Using the Internet (I-Fax) > Configure Your Brother Machine for Email or I-Fax > Receive an I-Fax Automatically
Receive an I-Fax Automatically
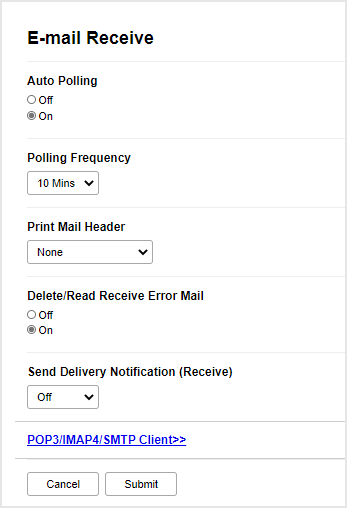
To receive an I-Fax automatically, use Web Based Management to configure receiving options, if needed.
- Start your web browser.
- Type "https://machine's IP address" in your browser's address bar (where "machine's IP address" is the machine's IP address).
For example:
https://192.168.1.2
- If required, type the password in the Login field, and then click Login.
 The default password to manage this machine’s settings is located on the back of the machine and marked "Pwd".
 - Go to the navigation menu, and then click .
 Start from
 , if the navigation menu is not shown on the left side of the screen.
 - Configure the settings as needed.


There are two ways to receive email messages:
- POP3/IMAP4 receiving at regular intervals
- POP3/IMAP4 receiving, manually initiated
When using POP3/IMAP4 receiving, the machine polls your email server to receive data. Polling can occur at set intervals (for example, you can configure the machine to poll the email server every ten minutes) or you can manually poll the server.
- When finished, click Submit.
- If your machine starts to receive email data, the LCD will display [Receiving].The email will print automatically.
- If your machine is out of paper when receiving data, the received data will be held in the machine's memory. This data will be printed automatically after paper is re-inserted into the machine.
- If the received mail is not in a plain text format, or an attached file is not in the TIFF format, the error message "ATTACHED FILE FORMAT NOT SUPPORTED." will be printed.
- If the received mail is too large, the error message "E-MAIL FILE TOO LARGE." will be printed.
- If Delete/Read Receive Error Mail is On (default), then the error mail will be deleted (POP3) or read (IMAP4) from the email server automatically.
Did you find the information you needed?


