Home > Paper Handling > Load Paper > Load Paper in Paper Tray #1 / Paper Tray #2 > Load Photo Paper in Paper Tray #1


Load Photo Paper in Paper Tray #1
- If the [Check Paper] setting is set to [On] and you pull the paper tray out of the machine, a message appears on the LCD, allowing you to change the paper size and paper type.
- When you load a different paper size in the tray, you must change the Paper Size setting in the machine or the paper size setting on your computer.
Doing this enables the machine to automatically feed paper from the appropriate tray if Auto Tray Select has been set in the printer driver (Windows) or on the machine. (MFC-J5855DW/MFC-J5955DW)
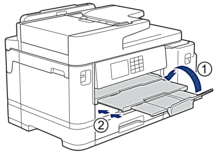
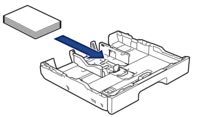
- If the paper support flap (1) is open, close it, and then close the paper support (2).
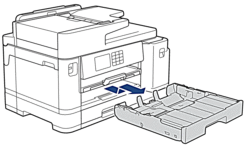
- Pull the paper tray completely out of the machine as shown by the arrow.
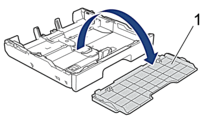
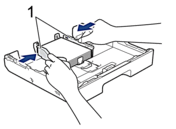
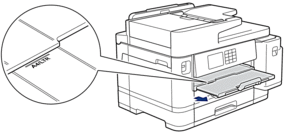
- Remove the tray top cover (1).
- Do one of the following:
- If you load Photo L (3.5" x 5")/(9 x 13 cm) in the paper tray, lift the Photo L stopper (1).
- If you load Photo (4" x 6")/(10 x 15 cm) in the paper tray, lift the Photo stopper (2).
- If you load Photo 2L (5" x 7")/(13 x 18 cm) in the paper tray, lift the Photo 2L stopper (3).
Gently press and slide the paper width guides (4) to fit the paper size.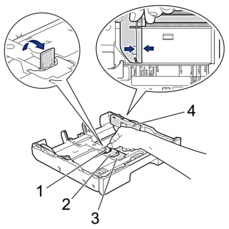
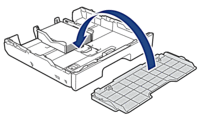
- Load up to 20 sheets of photo paper in the paper tray with the printing surface face down.Loading more than 20 sheets of photo paper may cause paper jams.
- Gently adjust the paper width guides (1) to fit the paper.Make sure the paper guides touch the edges of the paper and the paper is flat in the tray.
- Replace the tray top cover.
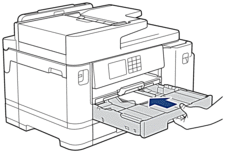
- Slowly push the paper tray completely into the machine.
- IMPORTANT
-
DO NOT push the paper tray into the machine forcefully or quickly. Doing this may cause paper jams or paper feed problems.
- Pull out the paper support until it locks into place.
- Change the paper size setting in the machine's menu, if needed.
Did you find the information you needed?