Home > Routine Maintenance > Clean Your Brother Machine > Clean the Print Head from Your Computer (Windows)
Clean the Print Head from Your Computer (Windows)
To maintain good print quality, the machine automatically cleans the print head when needed. If there is a print quality problem, start the cleaning process manually.
If you start the cleaning with low ink amount, it may cause damage to the machine. Check each ink tank level before starting the cleaning and refill each ink tank as necessary.
- Hold down the
 key and press the
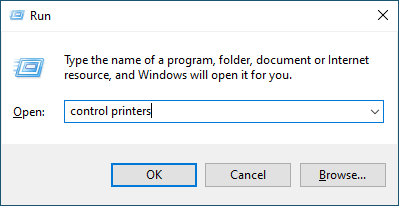
  key on the computer's keyboard to launch Run.
 - Type "control printers" in the Open: field and click OK.
 The Devices and Printers window appears.
 If the Devices and Printers window does not appear, click .
 - Right-click your model's icon, and then select Printing preferences. (If printer driver options appear, select your printer driver.)The printer driver dialog box appears.
- Click the Maintenance tab.
- Select one of the following options:OptionDescriptionCheck Print Quality...Use to print the test page and check the print quality.Print Head Cleaning...Use to start the cleaning process manually. Select if a line or blank spaces appear in text or graphics on the test page.
- Do one of the following:
- If you selected the Check Print Quality... option, click Start.
The machine prints the test page.
- If you selected the Print Head Cleaning... option, select the Black only, Color only, or All option for the cleaning type, and then click Next.
- Select the Normal, Strong, or Strongest option for the cleaning strength, and then click Next.
- Click Start.
Did you find the information you needed?


