


| | |
| 1 | Load your document. | ||
| 2 | Start the Presto! PageManager software that was installed during the MFL-Pro Suite installation to scan a document. | ||
| 3 | Click File, then Select Source. | ||
| 4 | Choose the scanner you are using from the Select Source list. | ||
| 5 | Check Tool, Scan Settings and uncheck Suppress Twain User Interface. Click OK. | ||
| 6 | Click Acquire Image Data. The Scanner Setup dialog box appears. | ||
| 7 | Adjust the following settings, if needed, in the Scanner Setup dialog box: 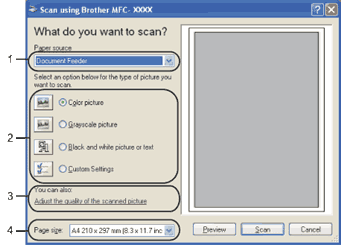 | ||
| 8 | Choose Document Feeder from the Paper source drop-down list (1). | ||
| 9 | Choose the picture type (2). | ||
| 10 | Choose the Page size from the drop-down list (4). | ||
| 11 | If you want to change some advanced settings, click Adjust the quality of the scanned picture (3). You can choose Brightness, Contrast, Resolution and Picture type from Advanced Properties. Click OK after you choose the settings. 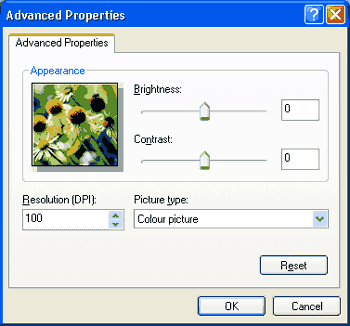
|
| | |