| | |
| • | For network scanning, a maximum of 25 clients can be connected to one machine on a network. For example, if 30 clients try to connect at a time, 5 of those clients will not be shown on the LCD. |
| • | (Windows®) If your PC is protected by a firewall, and is unable to network scan, you may need to configure the firewall settings. If you are using Windows® Firewall and you installed MFL-Pro Suite from the CD-ROM, the necessary Firewall settings have already been made. For more information, see Firewall settings (For Network users). |
| 1 | (Windows® 2000) Click the Start button, Settings, Control Panel, then Scanners and Cameras. (Windows® XP) Click the Start button, Control Panel, Printers and Other Hardware, then Scanners and Cameras (or Control Panel, Scanners and Cameras). (Windows Vista®) Click the  | ||||
| 2 | Do one of the following: | ||||
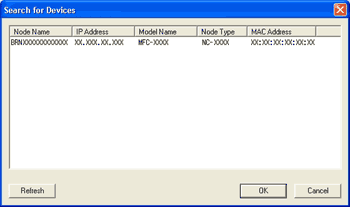
| 3 | Click the Network Setting tab and choose the appropriate connection method. 
 | ||||
| 4 | Click the Scan To Button tab and enter your PC name in the Display Name field. The machine’s LCD displays the name you enter. The default setting is your PC name. You can enter any name that you like. 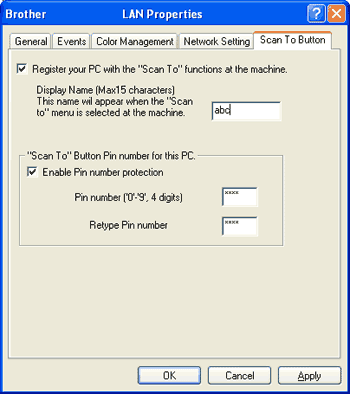 | ||||
| 5 | If you want to avoid receiving unwanted documents, enter a 4-digit PIN number in the Pin number and Retype Pin number field. To send data to a PC protected by a PIN number, the LCD prompts you to enter the PIN number before the document can be scanned and sent to the PC. (See Using the Scan key on your network.) |
| | |